 |
| Make a Smilebox scrapbook |
Monday, December 15, 2008
Happy Holidays!
Life is crazy!!! We have been trying to establish a good schedule for us all, so far.... Anyhoo, we've been getting ready for the holidays, baking, Christmas cards (no creations, newletter instead) cleaning, you know the drill. Here is a little photo montage for the holidays, so enjoy!
Thursday, November 20, 2008
Our little pumpkin
Well, she's finally here! It's been a while since I updated this so here it goes...

Elizabeth Grace was born October 3rd at 8:00 am. via c-section, she was 9 lbs 10 oz (a little smaller than expected) and everything went as planned. However, if anyone tells you that a c-section is easy (yes Cristy, I'm talking to you:)) hit them for me. It was the scariest experience! Obviously totally worth it and the recovery time is a piece of cake, but the actuall surgery, yikes! Check out all our photos from the first week here Anyhoo...It's been a bit tougher than expected balancing both kids, the house and my business. Motherhood as eliminated all my free time, so I haven't been doing any card making or MaryKay.
BUT... I have just finished my yearly projects for Cameron Mitchell Restaurants. If you haven't heard of them, they are a FABULOUS restaurant chain based here in Columbus. THey used to own Mitchell Fish Markets and Mitchells' Steak Houses, but Cameron sold those concepts off last year to Ruth Chris' Steakhouses and another company as well. Now he is focusing on creating new concepts to open, so far my favorite is Marcella's - YUMMM. Check out all I did for them HERE. It took quite a bit of time to create the items for the 15 current stores and they already have me slated for more for next year. I will be decorating my house for the holidays this weekend and life will slow down hopefully enough that I will be able to actually make my own christmas cards this year. I promise to update you on my creations as soon as I do them.
Hugs and thanks for all your well wishes!
Sunday, September 14, 2008
Why I haven't been creating...
Don't get excited... the baby hasn't come yet. I was hoping my doctor would have scheduled a c-section for me sometime soon, but no such luck. My cervix is thin but won't open due to the scar tissue from multiple past procedures. That was a plus earlier in the pregnancy, but now... not so much.
Although I am not diabetic, the baby is now apparently 8 lbs, 12 oz (mini amazon) now, but it could be a pound either way, so she could be 9 lbs 12 oz, or 7 lbs, 12 oz. (if I'm lucky). I still have 4 weeks to term, and at this stage babies generally gain about 1/2 lb+ a week so she will probably be a 10 lb + baby. My doctor is unwilling to induce early or decide to do a c-section until we get closer to the due date due to possible complications.
I am very huge, very uncomfortable, and VERY ready to have my body back. I am still on limited activity, but have been doing everything short of jazzercise if it means I will go into labor. I haven't been doing much of anything creative, just trying to get my house in order before the baby arrives.
Rob has been a HUGE help these last 2 weeks and continues to make me sit or lay down all the time. He has put up with a lot from this pregnancy. Overall this is easier than Lily's pregnancy, but the last 2 weeks have been difficult and we are bummed that we could have 4 more long weeks (at least I am). As long as we are all happy and healthy at the end, it's worth it.
I promise, I will TRY to get to creating soon. I miss doing all the SCS challenges as they keep my mind thinking outside the box. Please be patient...I will return!!!!
Monday, August 25, 2008
I know it's not cards...
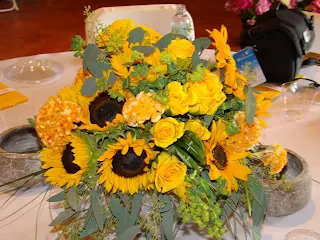
But I've really been busy! I just spent the last week preparing and planning my girlfriend's - mom's wedding. It was so much fun to get back into the Special Event planning hat for a week. It kind of makes me miss working in that field...kind of. Being 34 weeks pregant and creating 16 centerpieces, altar pieces and bunches of misc. items for the event made me EXHAUSTED by Saturday night. But it was totally fun, not that I'm ready to do that work full-time again.


 The altar had two lamp posts decorated with flowers on either side. It had a "street" theme.
Here are some crummy photos of the flowers I did. Each table was a different color or red, pink, purple, yellow, orange and green, with coordinating napkins and accents.


 The altar had two lamp posts decorated with flowers on either side. It had a "street" theme.
My camera didn't do a great job capturing the essence of the room. The place for the event was called Snook's Dream Cars in Bowling Green. Ohio. It is a quirky little car museum that could have been really cheezy, but was done with great attention to detail and I loved it! They have done a great job getting not only beautiful antique cars, but have set up a great atmosphere and other car related memorialbilia and antique games that feature a car theme. My husbands favorite was the Drunk-o-Meter, that shocked you based on how drunk you are and how well you play the game. He is now commited to finding one for his "man cave". If you are at all into cars - which I am not - or even have someone in your life that is, check this place out next time your in town. It's a quick visit.
It is a quirky little car museum that could have been really cheezy, but was done with great attention to detail and I loved it! They have done a great job getting not only beautiful antique cars, but have set up a great atmosphere and other car related memorialbilia and antique games that feature a car theme. My husbands favorite was the Drunk-o-Meter, that shocked you based on how drunk you are and how well you play the game. He is now commited to finding one for his "man cave". If you are at all into cars - which I am not - or even have someone in your life that is, check this place out next time your in town. It's a quick visit.All in all, it was a great time, the bride and groom are in love, too adorable, and enjoy each other's company, what more can you ask for?
Monday, August 18, 2008
Off of cards, for the week...
I know it's been a while, but I haven't been making cards this week. This week I focused on gifts for my BFF's little sister, we are both pregnant with girls and due only 2 weeks apart. So I spent this week creating things for her to give her at her baby shower this past Saturday.  The first items are a set of custom onsies. The one shown is the one I liked the best, it makes me giggle. The image is an iron-on from Joanne's - too cute eh? I stamped the words 'little stinker' with whimsical lower case stamps and craft ink. I thought about using the Stazon...any suggestions? On the back, 'big' is done with Big Deal Alpha and pink fabric paint - the craft in light colors tends to dissapear after 1 wash - and 'stinker' again with the black craft. I made 3 others for her, one with her name 'Natalie', 'princess' and the last, 'Q-T'. All of them had the cute stick figures on them.

The first items are a set of custom onsies. The one shown is the one I liked the best, it makes me giggle. The image is an iron-on from Joanne's - too cute eh? I stamped the words 'little stinker' with whimsical lower case stamps and craft ink. I thought about using the Stazon...any suggestions? On the back, 'big' is done with Big Deal Alpha and pink fabric paint - the craft in light colors tends to dissapear after 1 wash - and 'stinker' again with the black craft. I made 3 others for her, one with her name 'Natalie', 'princess' and the last, 'Q-T'. All of them had the cute stick figures on them.The last item I made for her is this...
I am SO impressed with myself. I made it late one night and almost had to wake my hubby up to admire my work! I also had to make another one for my bundle of joy 'cause it's just so darn cute!!! I have now purchased tons more fabric to make more for her and Lily, so they match. Now I can see why my mom had so much fun dressing my sister and I alike.
Well that's it for now. I promise to get back to stamping this week!
Sunday, August 10, 2008
A night of fun
This card so so outside my norm but I really liked how it came out! I spent the evening creating for some me time. I worked ahead of the group (my teachers would be so proud) and did the Verve Anniversary challenge AVS10 early, then realized I couldn't post today. So much for being the early bird!

I'm in a Designer Paper (DP) mood tonight, so the striped paper inspired the colors for this one. The colors used are Certainly Celery (CC), Ruby Red (RR) Pumpin Pie (PP), Perfect Plum (PP2), and lastly, yes it's true, some of it still exists, COOL CARRIBEAN (CC2)!!! I am a paper horder you know. The main panel of RR (run thru the Cuttlebug) and the DP is layered on CC2 and CC with ribbon from Sorbet wrapped around the middle (I wish I could get 10 yards of this stuff!). I layered on 3 panels of PP (again run thru the Cuttlebug) over the ribbon. The sentiment is from 'For a Friend' inked with RR and Lavendar Lace markers. The flame is some 3D glue I got from Michaels with some glitter on it. That is layered on CC and CC2. Finally I added a 1" circle of PP2 with a circle of white uniball ink (traced around a 3/4" circle) cut it in half and added it to the corners. I never would have come up with this sketch on my own, so its good to try something new. I really liked how it came out!
I'm in a Designer Paper (DP) mood tonight, so the striped paper inspired the colors for this one. The colors used are Certainly Celery (CC), Ruby Red (RR) Pumpin Pie (PP), Perfect Plum (PP2), and lastly, yes it's true, some of it still exists, COOL CARRIBEAN (CC2)!!! I am a paper horder you know. The main panel of RR (run thru the Cuttlebug) and the DP is layered on CC2 and CC with ribbon from Sorbet wrapped around the middle (I wish I could get 10 yards of this stuff!). I layered on 3 panels of PP (again run thru the Cuttlebug) over the ribbon. The sentiment is from 'For a Friend' inked with RR and Lavendar Lace markers. The flame is some 3D glue I got from Michaels with some glitter on it. That is layered on CC and CC2. Finally I added a 1" circle of PP2 with a circle of white uniball ink (traced around a 3/4" circle) cut it in half and added it to the corners. I never would have come up with this sketch on my own, so its good to try something new. I really liked how it came out!
Easy Peasy!
I think this may be my favorite one I did last night, although the photo came out blurry. This is also for the Verve Anniversary challenges, AVS09.

I was inspired by the Designer Paper for this one. The colors are Kraft (K), Certainly Celery (CC) Pumpkin Pie (PP) and...wait for it...Cool Carribean (CC2)! I know you are all jealous, I have a huge stash of it still! The striped DP and the paisley DP are layered on CC and CC2, all placed on a K card body. I wrapped the layers with ribbon from Sorbet. The sentiment from 'Happy Harmony' is stamped with Close to Cocoa on Whisper White, then layered it on PP, CC, CC2 and K. I added a flower from the Pretties kit colored with So Saffron and Apricot Appeal then added the gold bling! Super easy peasey!
I was inspired by the Designer Paper for this one. The colors are Kraft (K), Certainly Celery (CC) Pumpkin Pie (PP) and...wait for it...Cool Carribean (CC2)! I know you are all jealous, I have a huge stash of it still! The striped DP and the paisley DP are layered on CC and CC2, all placed on a K card body. I wrapped the layers with ribbon from Sorbet. The sentiment from 'Happy Harmony' is stamped with Close to Cocoa on Whisper White, then layered it on PP, CC, CC2 and K. I added a flower from the Pretties kit colored with So Saffron and Apricot Appeal then added the gold bling! Super easy peasey!
Shall I dare?
I'm on a mission! I'm going to do all the Verve Anniversary challenges! This one is for AVS05. I've never made a long card before so I'm not sure of what dimensions to use. I know I'll have to make my own envelope for this one.

I used Regal Rose (RR), Pretty in Pink (PP), Rose Red(RR2) and the new SU! In Color Pink Pirouettte (PP2). I started off my embossing with white EP 3 images of the flower from 'Dare to be Fabulous' on RR, PP and PP2. I cut them out with the PP2 the smallest flower, PP the medium flowr and RR the largest flwoer. It is put together with dimensionals and I added 3 pearls to the center for some glam. The flower is layered on PP2 stamped with 'Filagree' then layered on RR2 and RR. The main background is all on RR. I stamped the next layer of RR with the 'Polkadot' background stamp with RR ink and embossed the sentiment in the bottom left corner with white EP and colored in the word with RR and RR2. The center layer is PP2 stamped again with the 'Filagree' background stamp and layered on RR2 with the bottom edge punched out with my SU! scallop punch. I added the holes with my 1.8" punch. RR grosgrain ribbon was wrapped around this layer and I added a bow with a mini glue dot.
So how confusing was that with all the RR's and the PP's?
Funky fresh
This is another one I did last night, its for the Verve Anniversary challenge AVS07. I used only designer paper on this one. I love this paper, its so vintage, cool and fresh!

The bright Designer Paper (DP) inspired the colors of this card. I used So Saffron (SS), Elegant Eggplant (EE) Regal Rose (RR), and Soft Sky(SS). The 1st layer is the SS DP prints from SU! layered on EE. I then wrappes SS ribbon around the bottom and added a bow with a mini glue dot. The fun DP is layered on SS and EE. I used my scallop punch to do the bottom edge of the EE then layered RR behind it for extra color. The sentiment is from'Sincere Salutations' on Whisper White paper with EE ink, then sponged with SS around the edges. That is layered on SS, RR and EE. I added a flower with a pink brad for fun. It's not my favorite card, but it's cute.
The bright Designer Paper (DP) inspired the colors of this card. I used So Saffron (SS), Elegant Eggplant (EE) Regal Rose (RR), and Soft Sky(SS). The 1st layer is the SS DP prints from SU! layered on EE. I then wrappes SS ribbon around the bottom and added a bow with a mini glue dot. The fun DP is layered on SS and EE. I used my scallop punch to do the bottom edge of the EE then layered RR behind it for extra color. The sentiment is from'Sincere Salutations' on Whisper White paper with EE ink, then sponged with SS around the edges. That is layered on SS, RR and EE. I added a flower with a pink brad for fun. It's not my favorite card, but it's cute.
Polkadot Imperfection
So as I sat up creating for a while last night, I started off with a bang, and ended up at a whisper. Let me show you...
 This card was the last one I did, it's for the Verve Anniversary challenge AVS06. Notice how the words are not center in the circle, and how my brads on either side have a different placement? I think I may have dosed off while making this one. Anyhow, I used SU! colors Basic Black (BB), Certainly Celery (CC) and Old Olive (OO). I stamped the OO with the Polka-dot background stamp with OO ink, then wraped the corners with a wide black and white polka-dot ribbon. I layered that on BB. The center circle is from 'Sage Advice', it's probebly one of my favorite quotes. I stamped it with Versamark on CC Designer Prints paper and cut it out - incorrectly- with my Colluzle (I don't have Nestabilities yet). The scallop edge is from Quickutz and I cut out BB, then made more polka-dots with my uniball white gel pen. The side panels is the ribbon and I used my Crop-a-dile to punch the holes for the brads. I didn't notice the brads were off until after I had finished the card. Oh well! The whole thing is on a Whisper White card body.
This card was the last one I did, it's for the Verve Anniversary challenge AVS06. Notice how the words are not center in the circle, and how my brads on either side have a different placement? I think I may have dosed off while making this one. Anyhow, I used SU! colors Basic Black (BB), Certainly Celery (CC) and Old Olive (OO). I stamped the OO with the Polka-dot background stamp with OO ink, then wraped the corners with a wide black and white polka-dot ribbon. I layered that on BB. The center circle is from 'Sage Advice', it's probebly one of my favorite quotes. I stamped it with Versamark on CC Designer Prints paper and cut it out - incorrectly- with my Colluzle (I don't have Nestabilities yet). The scallop edge is from Quickutz and I cut out BB, then made more polka-dots with my uniball white gel pen. The side panels is the ribbon and I used my Crop-a-dile to punch the holes for the brads. I didn't notice the brads were off until after I had finished the card. Oh well! The whole thing is on a Whisper White card body.
Saturday, August 9, 2008
Verve-a-licious!
I have to say that I love all the images made by Verve Stamps. They are cute, fresh, stylish and fun! I just wish I owned some...but alas, with baby #2 only a few weeks away, my stamping budget is being spent elsewhere. I do enjoy receiving Verve updates from Poetic Artistry, a blog by the company's owner and stamp designer Julee Tilman. Last week was the companies first anniversary and they were having card challenges everyday. Since I was out of town, I'm doing them now.
 I made this card for my BFF younger sister, who is having a baby girl (just like me) on the 15th of September. I can only hope my baby decides to come that early, as she is due October 8th, but is likely to arrive early.
I made it using the Verve sketch AVS02, and I used Whisper White (WW), Pretty in Pink (PP), Regal Rose (RR) and 2 designer papers(DP) from Memory Makers. Its a square card, which I almost never make, so it was a great challenge for me. The card base is WW layered with PP and RR. The striped DP is scalloped using the SU scallop punch with holes punched out with the 1/16th punch. Those layers are then wrapped with a retired SU! ribbon (I'm a ribbon and paper horder). The next layer is made with the green polka-dot DP again, punched with the scallop punch, I cut the square in half and attached it to a piece of RR. I layered clear(backed with PP), green and clear green buttons on the RR with mini glue dots around the edge. I then attached my sentiment (For a Friend) which was stamped with Always Artichoke ink and colored in with PP and RR markers, layered on Old Olive paper. I attached the sentiment with 3 layers of dimensionals above the buttons and added PP buttons on top. Finally I made a knot with the retired ribbon and attached it with a mini glue dot.
I'm planning on creating some special gifts for her, as she lost her first baby 3 days after she developed toxemia and had to deliver at 25 weeks early last year. This new baby for her is a gift from God that will be spoiled like the princess she will be!!!
I made this card for my BFF younger sister, who is having a baby girl (just like me) on the 15th of September. I can only hope my baby decides to come that early, as she is due October 8th, but is likely to arrive early.I made it using the Verve sketch AVS02, and I used Whisper White (WW), Pretty in Pink (PP), Regal Rose (RR) and 2 designer papers(DP) from Memory Makers. Its a square card, which I almost never make, so it was a great challenge for me. The card base is WW layered with PP and RR. The striped DP is scalloped using the SU scallop punch with holes punched out with the 1/16th punch. Those layers are then wrapped with a retired SU! ribbon (I'm a ribbon and paper horder). The next layer is made with the green polka-dot DP again, punched with the scallop punch, I cut the square in half and attached it to a piece of RR. I layered clear(backed with PP), green and clear green buttons on the RR with mini glue dots around the edge. I then attached my sentiment (For a Friend) which was stamped with Always Artichoke ink and colored in with PP and RR markers, layered on Old Olive paper. I attached the sentiment with 3 layers of dimensionals above the buttons and added PP buttons on top. Finally I made a knot with the retired ribbon and attached it with a mini glue dot.
I'm planning on creating some special gifts for her, as she lost her first baby 3 days after she developed toxemia and had to deliver at 25 weeks early last year. This new baby for her is a gift from God that will be spoiled like the princess she will be!!!
It feels like spring...
Well, I'm back from our last vacation of the summer...it was a long one for me! A week in Petoskey Michigan (fabulous place and weather!) then 3 more days in Perrysburg with my parents before they left for Seattle for 5 1/2 weeks! Whew...now that I'm back, I'm following Doctors orders, doing things that keep my stress level to a minimum for baby's sake :). So that means stamping (No arguement here)!

Here is one I did for last weeks SCS color challenge 177, Groovy Guava (GG), Whisper White (WW) and Sahara Sand(SS). I of course added another neutral (well, what I consider a neutral), Chocolate Chip(CC). The card base is an A2 card of SS. The bottom layer is SS stamped with the wheel from the Spring Solitude Bundle inked with SS. I sponged the edges with SS and layered it on GG with the bottom edge punched with the new SU! scallop punch (love it!) and polka-dots with my unibal white gel pen. I wrapped the layer with a wide white grosgrain ribbon I have. The second layer is on SS stamped with the Spring Solitude solid flower stamp with SS ink, then I used Versamark with the flower outline stamp to emboss with white EP that over the other stamped images (does that make sense?) My embossing buddy failed me this time, as there are TONS of white EP flakes everywhere. I stamped the sentiment with SS marker and Versamarker and embossed the word 'you' with white EP. The panel is sponged with SS around the edges and layered on GG. I then attached that to the 1st layer and wrapped it with CC grosgrain ribbon. The final layer I used the branch stamp, inked with CC marker and SS marker and stamped it on SS, then stamped the bird with Versamark and embossed with white EP. I punched the image out with my 1 1/4" square punch and sponged the edges with SS, used my 1 3/8" punch with WW and cut out CC to frame this. Finally, GG is punched out with my Marvy scallop square punch with white polkadots again around the edge and I added a CC grosgrain knot with a mini glue dot. I have to say that I really like this stamp set, it's a shame it to me so long to get it!
Saturday, July 26, 2008
Double-ly adorable!
I had some time after the birthday party, so while Lily was sleeping and I was doing laundry, I made this card. Talk about multi-tasking!

This is for the SCS card sketch challenge #186 this week. I started by selecting a stamp set that would complement the strip along the bottom of the sketch, so I picked out Double Line Doodles (retired SU!). I stamped the long strip first on Certainly Celery with CC ink, then highlighted the image with my uniball White gel pen and Old Olive marker. I layered that on Old Olive paper and using scalloped scissors, trimmed the edges down the length of the paper. Next I used another retired SU! item, the background paper (don't remember the name) and layered that on CC and Always Artichoke. The second panel is the SU! DS Print paper in Certainly Celery, layered on Old Olive. I stamped 'adorable' from Warm Words with Always Artichoke, 'cause she's adorable! The main image from the stamp set is stamped on Whisper White with Always Artichoke, then sponged with CC and OO. I then cut out the center if the image and featured a photo of Lily behind it (isn't she cute!). That is layered on CC and AA trimmed with the scallop scissors (I don't have the Nestabilities yet) and I put white polkadots around it with the white gel pen. I added Moss grosgrain ribbon under the image and attached it with dimensionals. That's it! Thanks for looking!!

This is for the SCS card sketch challenge #186 this week. I started by selecting a stamp set that would complement the strip along the bottom of the sketch, so I picked out Double Line Doodles (retired SU!). I stamped the long strip first on Certainly Celery with CC ink, then highlighted the image with my uniball White gel pen and Old Olive marker. I layered that on Old Olive paper and using scalloped scissors, trimmed the edges down the length of the paper. Next I used another retired SU! item, the background paper (don't remember the name) and layered that on CC and Always Artichoke. The second panel is the SU! DS Print paper in Certainly Celery, layered on Old Olive. I stamped 'adorable' from Warm Words with Always Artichoke, 'cause she's adorable! The main image from the stamp set is stamped on Whisper White with Always Artichoke, then sponged with CC and OO. I then cut out the center if the image and featured a photo of Lily behind it (isn't she cute!). That is layered on CC and AA trimmed with the scallop scissors (I don't have the Nestabilities yet) and I put white polkadots around it with the white gel pen. I added Moss grosgrain ribbon under the image and attached it with dimensionals. That's it! Thanks for looking!!
Emma's Birthday!
Lily's best friend from preschool, Emma had her Cinderella birthday party today! Lily had tons of fun with her friends from school playing princesses, swinging and picking flowers (aka weeds). We got Emma a Sleeping Beauty dress for her upcoming trip to Disney World, but this morning I decided I needed to make something a little extra. So in about an hour and 15 minutes, I came up with this collection of goodies for her next year at preschool!


This doesn't have any SU! products in it, so I can't explain what everything is and where it's from, but I can explain the process. The lunchbox is from the Target $1 spot, about 2 years ago (I hope they do them again this year). I used ModPodge to attach the paper with rounded corners to the front and the back. I usually do the whole name, but this is a small box and it didn't fit. So instead, I added her inital with a pre-made chipboard letter then applied ModPodge to the whole thing to make it water proof. Then embellished it simply with a prima flower, button and ribbon. The handle had ribbons tied to it in an array of colors. I made a crayon box slide with the same paper, punches and the retired SU! letter set letter dots (I don't think that's the name). The little pad of paper (its only 3.5"x3.5") has the same paper, chipboard and embellishments as the lunch box. Tosssed in a few pens and pencils and voila'!
Tuesday, July 22, 2008
It's a boy!
I just found out this morning that my girlfriend Carrie is having a baby boy! Just what she wanted! It's been fun being pregnant together. Now that we are both getting bigger, we bumb bellies when ever we see each other. She is about 2+ months behind me. I decided to make another card for her using the colors of the card challenge CC176. Its a fun combo!

I did add Chocolate Ship to this one also, even though it looks like black. I need to work on my camera... Anyhoo, I used a retired SU! paper (I don't remember the name) that is acutally Mellow Moss, but I thought it was close enough, and I sponged the edges with River Rock. The lower panel is River Rock, run thru the Cutllebug and both were layered on a piece of Chocolate Chip. I put a strip of Soft Sky stiched ribbon at the 'joint' with a knot attached with a mini glue dot. The main image is from Very Punny (minus the pun)on Very Vanilla, colored with SS and RR using a blender pen, and added So Saffron to the scallop. I sponged the edges and layered it on RR, SS and a Chocolate Chip scalloped square using my Marvy punch. All this is on a VV card base. Sweet and simple!
Look Familiar?
I really love Soft Sky, it's a shame it's being retired. I'm getting a bunch of it before it goes though. This is for the SCS color challenge CC176, and I actually finished this one within 12 hours of posting! That's a record for me.

The colors for this challenge were Soft Sky, River Rock and Very Vanilla. Its a lovely, soft combination. This is the same layout I did for the Mojo Monday #44 last month, it's very versatile. I started out with a Chocolate Chip card base, I know it looks like Basic Black, but it's not, its Chocolate Chip. (I cheated I know, but I like a little more contrast) and layered on Very Vanilla with a River Rock panel that was Cuttlebugged. On that, I added a Soft Sky panel, stamped on Script in SS and sponged the edges, then layered it on VV. The 3rd panel is the textured River Rock paper with sponged edges and layered also on VV. I added a strip of Soft Sky stiched ribbon on that as well. The main image is from Embrace Life, stamped in Chocolate Chip, with the flowers colored in with my uniball white gel pen and highlighted with SS using my aqua painter. I sponged the edges and layered it on RR, SS and CC. The scallop is SS with CC dots, then the sentiment is stamped on VV with CC and Script stamped over it with SS and sponged around the edges. I didn't have any embellishements in that great Chocolate Chip color, so I had to settle for Close to Cocoa buttons with a thin strip of River Rock threaded thru the holes.
Monday, July 21, 2008
A little suspense...
This card I just made, it's super easy and cute! It's for the SCS technique challenge TLC176. I had never made one and really think it's adorable, the directions are the the link, so check it out! I did however drop my stamp on the front after I had finished, since it was late, I didn't do it over.

Front of spinner
 Back of spinner.
I used Whisper White card stock for the card body, then tied the wide black polka dot ribbon around it and tied it off with a bow. Sorry the photo is off. I punched the scallop circle punch in the bottom right corner. The spinner is the ladybug from Very Punny, stamped on WW with Basic Black, and colored in with my aqua painter and Real Red ink. The other side is stamped with the 'thank you' stamp from Short & Sweet, outlined with the real red marker. I added dots around the edge with the Basic Black marker. The image and the sentiment were punched with the 1 1/4" circle punch and layered together back to back with a piece of red thread between. On the inside of the card, taped the ends of the thread to the back of the front of the card and placed a Real Red piece of card stock and with a punched a 1 3/8 circle out of that. Added some white polka dots and voila'! Sweet and simple!
Not so groovy...

Since I don't really like this card, I won't get into the specifics. It's for the SCS card challenge SC185 and color challenge CC174.
Dots, dots, dots!
So here is another one I made today. It was great having Lily with me creating, I had time to create with spending time with her!
 This one is for the SCS Color challenge CC175 and card layout challenge SC183. So Saffron, Almost Amethyst and Wild Wasabi. I have to admit, that this card is inspired by Markie's Mom at SCS. She makes the most beautiful cards, and always uses black and white polka dots. Check out her gallery, it's great!!!
I used the Simply Said stamp set, colored it with AA and SS and surrounded the image with Soft Sky using the aqua painter. The main image was layered on WW, AA and finished with Basic Black and i added the dots with my uniball white gel pen. The SS layer is SU! DP and the WW layer was Cuttlebugged with swirls. and bother are layered on Whisper White. I added the balck and white polkadot wide ribbon with a strip of Wild Wasabi Sticked ribbon down the center and added a knot with a mini glue dot. The main panel is AA on a card body of Basic Black and added white polkadots. The sentiment is from the same stamp set, i just used a few words from the stamp, along with some bling in the corner.
Thanks for looking!
This one is for the SCS Color challenge CC175 and card layout challenge SC183. So Saffron, Almost Amethyst and Wild Wasabi. I have to admit, that this card is inspired by Markie's Mom at SCS. She makes the most beautiful cards, and always uses black and white polka dots. Check out her gallery, it's great!!!I used the Simply Said stamp set, colored it with AA and SS and surrounded the image with Soft Sky using the aqua painter. The main image was layered on WW, AA and finished with Basic Black and i added the dots with my uniball white gel pen. The SS layer is SU! DP and the WW layer was Cuttlebugged with swirls. and bother are layered on Whisper White. I added the balck and white polkadot wide ribbon with a strip of Wild Wasabi Sticked ribbon down the center and added a knot with a mini glue dot. The main panel is AA on a card body of Basic Black and added white polkadots. The sentiment is from the same stamp set, i just used a few words from the stamp, along with some bling in the corner.
Thanks for looking!
It's Mojo baby!
This card was created for the Mojo Monday Week #45. It's late, but am I ever on time? Anyway, this is another card I created with Lily today.

I used the Blooming with Happiness stamp set, which I love. The DP(a gift from an old DDS) inspired the color combo, So Saffron, Wild Wasabi, Soft Sky, Almost Amethyst and Pumpkin Pie, it also has glitter on it, 'cause you know I love glitter! I used my corner punch for the scallops on the DP, since I haven't ordered my scallop edge punch yet. I layered it on Whisper White and punched that as well. The top DP is So Saffron Prints DP from SU! and the Almost Amethyst at the bottom is stamped with So Swirly with White Craft ink. I stamped the cake with Basic Black and colored the image in with So Saffron, Pumpkin Pie and Almost Amethyst, then used my aqua painter to do the Wild Wasabi and the Soft Sky around the image. The flames of the candles have a little shimmer to them (an Elmers craft glue I got at Michaels) and glitter on the flowers. The image and the sentiment is layered on AA and PP and WW on the image. Then I added the Soft sky ribbon and bling at the bottom to finish it off! Hope it inspires!
EEKKK!!
It's been a while hasn't it?!! Well, I've been out of town visiting friends and family, and my husbands family spent the weekend with us. So, I decided this was a day for me! Lily and I went down stairs to my stampin' space and created for several hours. I now have a wall filled with Lily originals. but she had more fun hanging her things up than creating it. She is fascinated with the tape dispenser.
Anyhow, I decided to tackle some more challenges from SCS. Here is today's TLC178 challenge. It was a combination of 3 different past challenges. Since my internet is on the 2nd floor and my space is in the basement, I thought the colors were Baroque Burgandy and Creamy Caramel, so I used that old retired color. It's not my favorite card, but it meets the requirements! Sorry the photo is off, I'm trying a new light.

I used my Cuttlebug and inked the folder so that when it was run thru the machine, the color went inside the dry embossing. (Check out the directions here). I did the baby wipe technique for the medallions from Baroque Motifs, cut them out and layered them on Chocolate Chip. I then stamped the smaller image from the set on the BB card stock and used Gold Rush EP then cut them out and layered them on the medallions. The Creamy Caramel layer is stamped with Canvas. I added the sentiment by stampining on some twill tape with the BB.
Thanks for looking!
Wednesday, July 2, 2008
Cherish
I had to make another one of these cards. They are too cute! This is actually the first one I did, but learned to used the acetate over the photo instead on stamping on it with Craft White because it takes FOREVER to dry, so it smeared.

Cherish
The card base of this card is a 6x6 Creamy Caramel card. I made the scalloped squares by using my Marvy punch. I layered on Pretty in Pink and the SU! retired DP Chocolate Chip. The photo is my DD Lily (isn't she cute!) layered on PP and CC. I stamped the 'cherish' with Craft White (see above) and added the buttons with mini glue dots. The 'thread' is the edges of grosgrain ribbon in ivory and chocolate.
Just for fun!

This card was just for fun. I started to CASE a card from SCS, then realized that I cut the DP panel too short. I went ahead and made a quick card with it anyway. I love this designer paper, I got it a few years ago and never used it, but it has some great colors in it. I used Soft Sky, Buckaroo Blue and Bravo Burgandy for the layering to match the DP. I used 'Sage Advice' for the sentiment and put the velvet green ribbon from the SU Sorbet collection under it and added a flower and some bling. It only took me about 15 minues for this card.
I'ts Mojo...
Mojo #44 & CC #173
 This card was created for Mojo Monday and for the SCS Color Challenge 173. The color challenge was Wild Wasabi, Certainly Celery, and Purely Pomagrante. I haven't used this stamp set (All Natural) in ages so I thought I'd use it for this one. The background is Cuttlebugged and layered on PP and on a Basic Black card base (I used creative license by added that color to the combo). The WW panel is stamped with 'Script' and sponged along the edges. It's layered on PP and I added some brads that I colored black with Black Stazon. I used Cetainly Celery DP for the next panel and layered it on the PP also with Wild Wasabi sticked ribbon wraped around. The stamped pear image is done with Stazon so I could use my aqua painter to color it (using all 3 combo colors). I masked the image and stamped the 'Script' over it with CC and sponged the edges. It's layered on WW, PP & Basic Black. The sentiment is stamped with Basic Black, and I did the same technique as I did with the pear. I punched out the sentiment with the 1 1/4" circle punch and layered it on a 1 3/8" PP circle and scalloped WW circle. I added the polkadots with the Uniball gel pen.
This card was created for Mojo Monday and for the SCS Color Challenge 173. The color challenge was Wild Wasabi, Certainly Celery, and Purely Pomagrante. I haven't used this stamp set (All Natural) in ages so I thought I'd use it for this one. The background is Cuttlebugged and layered on PP and on a Basic Black card base (I used creative license by added that color to the combo). The WW panel is stamped with 'Script' and sponged along the edges. It's layered on PP and I added some brads that I colored black with Black Stazon. I used Cetainly Celery DP for the next panel and layered it on the PP also with Wild Wasabi sticked ribbon wraped around. The stamped pear image is done with Stazon so I could use my aqua painter to color it (using all 3 combo colors). I masked the image and stamped the 'Script' over it with CC and sponged the edges. It's layered on WW, PP & Basic Black. The sentiment is stamped with Basic Black, and I did the same technique as I did with the pear. I punched out the sentiment with the 1 1/4" circle punch and layered it on a 1 3/8" PP circle and scalloped WW circle. I added the polkadots with the Uniball gel pen.
Time well spent...
I was able to spend a few moments creating last night (until 2 am), and was feeling a bit inspired. I was also catching up on my challenges and found this great paper that seemed to fit. This card was inspired by one of my dearest friends, who is done vacationing here in the states for the year and she flew back to Copenhagen on Monday. As I was going thru my stash of stamps, I found this one that I hadn't even mounted yet (for shame!!!) and thought it was perfect! So Anne if you're checking in, this one's for you!
Time well spent....
 This card is also for the SCS Color Challenge 172, Wild Wasabi, Taken with Teal and Whisper White. I took creative licence and added the Chocolate Chip because I had this great designer paper sitting around that, although the blue isn't exact, I think it gets carried off well. I did paper piecing for the flower from 'Time well Spent', trimed it with the Chocolate Chip marker, unibal White gel pen and Certainly Celery flower in the middle. I added the Teal rhinestone, because, let's face it, I'm part girly girl and love the bling. The Taken with Teal is Cuttlebugged and layered on Chocolate Chip. I then used sticky strip to adhere the beads and the Blue Brilliance glitter for some over the top sparkle. The designer paper is layered on TT and CC as is the sentiment which I colored in the 'Friends' using WW & TT with my aqua pen. The backgound WW is stamped with Canvas for some added texture.
Thursday, June 26, 2008
3-in1

Here I go again! 3 challenges in one!
WSC #51, CC114 & TLC #174
This layout is for Beate John's Weekend Sketch Challenge #51 . The color challenge CC114 I had, used the colors Gable Geen, Rose Red, Apricot Appeal and Taken with Teal. I had this fabulous designer paper that had all the colors except the Teal, so I added it with the ribbon and the around stamped bird image. I love this stamp, a $1 stamp from Michael's. I used Chocolate Chip on Whisper White paper and did the TLC174 challenge, so I filled it in with Rose Red and the aqua painter and used Taken with Teal around the Bird. I sponged around the edges with Apricot Appeal. Layered it on Rose Red and Chocolate Chip. The main Apricot Appeal background is Cuttlebugged, I layered the designer paper on Chocolate Chip. I used a retired teal velvet ribbon for the stripe on top. Sorry if this explanation is a little disjointed, I'm on the phone with my BF from Copenhagen!
Lily cards
Well, I after a very exciting night of tornados, lighting and thunder storms, and about 3 hours of sleep, my pregancy insomnia kicked in this morning at 5:00 am. Ahh the joys of pregancy! Since I was up I decided to spend some more time in my newly organized stamipn space and complete a few more challenges!
SC #182 & CC #171

I love both of these challenges! First, I have already professed my love of the color challenge with Soft Sky, Basic Black and Kraft, but I am loving this layout! It's cute, simple and makes great cards and scrapbook pages! I made 2 cards that can be used in a 6x6 scrapbook, so I'll be sending these out to the grandparents. The base is a 6x6 kraft square, I then used my Marvy scalloped square punch to make the Basic Black squares. The designer paper is one I have been hoarding for too long, so I decided to use it, the squares are 1 3/8" and the Soft Sky layer behind it is 1 1/2". After I assembled each piece, I used my uniball white gel pen to make the dots in the scallops. The photo is from my DD 2 year photos (she just turned 4) and my dear friend, the best photographer around Tracie Jacobs took these. Lily was looking at the hole in the tree saying it's where Owl from Winnie the Pooh lived. Any way, I layered the photo on Soft Sky and Basic Black. Because my first card front smeared (I used white craft), I ended up used a piece of acetate to put the sentiment on it with winter white EP. I attached it with black brads and tied Soft Sky and hemp twine thru the holes. That's it! I'll post the other card later that I did.
Wednesday, June 25, 2008
So sad...
My girlfriend's dog was hit by a car on Sunday. She was having a party and had to call all her guests that morning to cancel...eeek, the last thing you want to do in that situation. I made her this card to send her and let her know I'm thinking about her.
SC#181

I used the card sketch from the SCS weekly challenge. My dimensions are a bit off, but the essence is there. I used 'Embrace Life' stamp set, inked with Always Artichoke, then colored it in with Mellow Moss and So Saffron markers and Blender pens. I lost my Cutter Kit in the re-organization of my space, so I had to resort to the old way of distressing, my nails, around the edge of the stamped image. I also used sponge daubers to ink the edges with So Saffron and Always Artichoke inks. The lower panel is So Saffron DP, also distressed and inks. They are layered on Mellow Moss, So Saffron and Always Artichoke on a Mellow Moss card base. I stamped the leaves along the base of the Mellow Moss backgound for some added interest. For embellishments, I used Moss grosgrain ribbon, layered it with help twine and a Very Vanilla button.
Color Challenges!
My other favorite place to get inspired is at Splitcoast Stampers. it's a great resource for anyone interested in stamping! They have daily challenges and here are a few that I got caught up on:

CC#170, WSC #52
This challenge was to use, Regal Rose, Real Red and So Saffron. I had this great paper that I just got that had all those colors, so I thought I'd use it for this challenge. The So Saffron backgound is stamped with So Saffron ink and the 'Canvas' backgound stamp. It's layered on Real Red card stock. Now here's where I stray a bit... the next layer is Regal Rose, Cuttlebugged and put on More Mustard (not part of the challenge...oops). The 3rd layer is the designer paper on, again, More Mustard. The verbage is on Very Vanilla, stamped with Close to Cocoa and again with the 'Canvas' stamp and So Saffron ink for some texture. I finished off the card with twill ribbon, flower and rhinestone from the Target $1 stop, and punched out leaf from Target as well. I also paper pierced for some extra detail. This card is also inspired by Beate John's 'Weekend Sketch Challenge' #52. I'm sending this card of in the am to my DH grandmother, she sent us a generous gift for our 6th year anniversary! Thanks Grandma T!

This challenge was to use, Regal Rose, Real Red and So Saffron. I had this great paper that I just got that had all those colors, so I thought I'd use it for this challenge. The So Saffron backgound is stamped with So Saffron ink and the 'Canvas' backgound stamp. It's layered on Real Red card stock. Now here's where I stray a bit... the next layer is Regal Rose, Cuttlebugged and put on More Mustard (not part of the challenge...oops). The 3rd layer is the designer paper on, again, More Mustard. The verbage is on Very Vanilla, stamped with Close to Cocoa and again with the 'Canvas' stamp and So Saffron ink for some texture. I finished off the card with twill ribbon, flower and rhinestone from the Target $1 stop, and punched out leaf from Target as well. I also paper pierced for some extra detail. This card is also inspired by Beate John's 'Weekend Sketch Challenge' #52. I'm sending this card of in the am to my DH grandmother, she sent us a generous gift for our 6th year anniversary! Thanks Grandma T!
CC # 171

I LOVE this color combination! This challenge had us using Soft Sky, Basic Black and Kraft. LOVE IT!!!!! I had a miss hap when making this card, apparently I didn't clean my backgound stamp last time I used it, inked it with my Soft Sky and the ink pad turned green!!!! Boy was I mad!. After I regained my composure, I cleaned the stamp, and used Versamarker and clear EP to make the backgound panel on Soft Sky at the bottom (I can't remember the name of the stamp). The top panel I left plain and added the sentiment in Basic Black ink. Both panels are layered on Basic Black then on the Kraft card base. The image is from 'Garden Silhouettes' (I obviously like that set) stamped on Soft Sky with Versamark, then embossed with Winter White EP. I then sponged the bottom of the image for some depth because it looked a bit plain. It is also layered on Basic Black and Kraft. The ribbon is from the SU! Sherbet ribbon originals collection. I finished off the card with 2 Basic Black buttons tied with hemp. I really LOVE this card
Be Inspired!!
Since I have been without a stampin space for so ling, I have spent part of the day making cards from past challenges! I'll post each one based on the challenge and explain them so they are easy to find, so I hope that helps.


The first challenge catagory is the 'Be Inspired Challenge' by Beate Johns. If you are an avid stamper, you know who she is, but if you're not, check out her blog. She is AMAZING and creates beautiful works of art! She is taking the summer off, but has so much information on her site it will keep you busy until she returns!
BIC #16

Check out the inspiration sample by clicking here. I LOVED the color of the walls in the inspiration photo! I'll be painting a room in my house that color soon. The card base is 4.25" x 4.25" on Whisper White. I Cuttlebugged the front of the card so simulate the pattern of the wall on the right without adding more color. The square blocks are stamped with 'Embrace Life' on Soft Sky with SS ink, I think colored in the flowers using my uniball white gel pen. Each SS square is layered on Cool Caribean (yes I still have TONS of that paper - jealous???:) I put rhinestone brads in the colors of the flowers on the shelves to add the colors as well as layering the squares on Apricot Appeal and Regal Rose. A little loop of Celery grosgrain ribbon and I was done! It's not my favorite card, but I like it.
BIC #17

I liked this challenge (click here) because I have a black and white room in my house with green accents (or maybe it's the other way around). I did have a hard time with the matching of the blacks on the designer paper with the SU! basic Black, so I ended up using my black shimmer paper instead. It has a ton of shimmer and shine, perfect for a loyal girly girl friend. The image is from 'Garden Silhouettes' and I used white EP with versmark. The rest is just cut and paste! I found this sentiment in my scrap embellishment box so I'm not sure where it's from.
BIC # 18

This inspiration photo looks good enough to eat!!! I tried to recreate the wonderful icing details on the white panel, using 'Garden Silhouettes' again, colored with SU markers, Certainly Celery, Ruby Red, Apricot Appeal, and Bashful Blue. I layered it on Bashful Blue and Apricot Appeal card stock and used the Ticket Corner punch on the corners. The sentiment is stamped with Always Artichoke on Whisper White, layered on Ruby Red with the edges cut with a scallop scissor. The background is Groovy Guava, Cuttlebugged and layered on Apricot Appeal and again the corners are punched.
The chaos is over...I think?
So, about 3 weeks ago, I had a desk malfunction in my work space. The drafting desk I had gotten as a gift on my 16th birthday calopsed under the weight of all my stamp sets (it was 20 years old). So I have been spending the last few weeks getting everything re-organized and sell off some stuff to make space for new stuff. I was also at the mercy of my husbands good nature since I'm 6 months prego and can't lift anything heavy so it took much longer than I anticipated.What I have discovered, is that even with a HUGE purging (it was difficult) I still have entirely too much stuff!My space is in my basement, it's a typical basement, however, the previous owners glued drywall to the cinderblocks, so we cannot hang anything walls, or else it will rip the drywall off. This is my attempt to keep organized. This space also holds my MaryKay business empire.


Wednesday, June 11, 2008
Underneath chaos...
Sorry I haven't posted, my 'creating desk' callapsed under the weight of all my stamp sets. It was the drawing desk I got when I was 16 so I guess since it lasted me 20 years, I'll forgive it. I'll post before and after pictures when I get that mess cleaned up...whenever that is. I am excited though, I have a new neighbor that loves creating and stamping as much as I do, so I'm motivated to get her over here for some creating soon!

I thought I had downloaded the new pictures of Lily, but apparently I didn't. So I'll post some old ones from her 4th birthday at the end of April. This is the townhouse we got her. She has wanted to sleep in there for weeks now... it's hard to let her grow up!
Tuesday, June 3, 2008
The Whole Enchilada!

So for Monday's SCS Techniques challenge, the Whole Enchilada, we were challenged to make 3x3 cards and a coordinating box to go with it. Since I love making these it was no challenge!
I love using the Take Three stamp set for 3x3 cards, it gives a great simple, but adorable card to add to any package! I used Creamy Caramel paper as the card base and box base. The image is stamped on Whisper White card stock and I used Close to Cocoa and Chocolate Chip markers to ink the stamp. I then colored in the flowers with Pretty in Pink. I layered the image on Chocolate chip paper and added a brown grosgrain bow with a glue dot.
The box was just as simple, I layered the front flap with Chocolate Chip added an extra layer of Regal Rose under the image and closed the box with a small velcro dot. The ribbon is attached by using the horizontal punch, threading thru the ribbon and adhering the ribbon to itself with aglue dot.
Easy Peasie Lemon Squeezie!
Red Bird Blues

It's so much fun to create! I did today's SCS Color Challenge which was Blue Bayou, Soft Sky and Real Red. Strange combo but looks great together! I also used an oldie but a goodie layout from SCS, SC97.
I only used one SU! stamp, So Swirly on the soft sky main background (oops!). The second panel was made by wetting a piece of Whisper White paper, then using the direct to paper technique, rubbing Soft Sky all over it. Before it dried, I sprayed rubbing alcohol on it. It didn't give the effect I wanted (it's better on H2O paper) so I stamped over it with a stamp set from Autumn Leaves (I don't know what its called) with Soft Sky, then embossed with white over it, then stamped with Blue Bayou over it. Time consuming, but I like it! The bird stamp I got from Michaels in the $1 bin a while back. I used my Aqua painter to fill in the bird with Real Red, finished off the card with red polka-dot ribbon and red snaps. So like I said earlier, the only thing that is SU is the paper and the 1 stamp.
Tuesday, May 27, 2008
Paper, paper, everywhere!
Hi! My name is Kristin and I'm a paper hoarder.....
I have so much designer paper! I have probably a stack of designer paper that is about 1 foot thick! Crazy I know, I have a problem, I am seeking help. But until then, I have decided that anytime I decide to create I must use up 1 sheet of designer paper. It does give me heart palapations doing this, but I do collect about 2-4 pieces of the same pattern so as to not run out. The main reason I'm doing this is because I want to get some new stuff and have run out of room for it.
Anyway...here are some cards I made with a 8x8 sheet of paper given to me by one of my SCS big sisters a few cycles back. When I saw initally saw it I thought it was quite ugly, but now that I've been working with it, I'm really liking it. It has a strange color combo that really seems to be working. Apricot Appeal, Pumpkin Pie, Almost Amethyst, Regal Rose (could use Pixie Pink) Soft Sky, and Bashful Blue. I was able to make 6 cards with it and have a bit left over, but I'm tired today so it will wait until nextime.


Subscribe to:
Posts (Atom)
Visit my NEW Website!
After twenty years in papercraft and florals, I have finally decided to switch Paperfiori over to a website of my own. Don't worry! All...

-
 Hi all! Welcome back here at Paperfiori...I'm eager to share with you the next challenge with AAA Cards Challenge blog. We are starti...
 -
 I am SO excited to be a part of this blog hop celebrating the newest Paper Crafts Magazine issue, 350 Cards and Gifts! I was so surprized ...
 -
 Happy Holidays Blog Hop Peeps! I can't believe it's already December! ....where does the time go?.... It's an exciting month ...