Saturday, January 16, 2010

Redemption

I am the Queen of Cakes! I have re-claimed my kingdom and title!
After many failed attempts, I finally conquered my quest. I was begining to think I was crazy, with my coconut shells, 'galloping' along with my trusty blond squires as I attempted to perfect the Holy Grail of baking...Fondant.

Since this is a documentation of all my things creative, I am sharing with you all my failed attempts and triumphs. This way my girlfriends will know that I am only human and make LOTS of mistakes before I get sugary perfection. Below are the photos of the mishaps, the finished pieces and the lessons I learned.
COOKIES
Before...don't forget to add the vanilla, but they will still taste good if you use enough powdered sugar.
After...yum. Don't refridgerate your iced cookies. The icing gets white spots all over it.

CUPCAKES
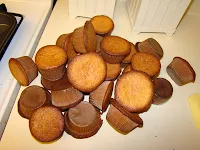
Before...cupcakes don't need 30 minutes to cake at 325. Anyone that tells you that is crazy. Also, don't try to multi-task your baking. They tell you to cook on the center rack for a reason.

After...Marshmellow Fondant is very pliable, fairly tasty and easy to make. NEVER buy fondant unless you are making a standing figure. Also wear food safe gloves before adding food coloring and kneading. Especially if you are going out for drinks 2 hours later. You will have brown palms for a while.

CAKES
Before...I thought that using the chocolate modeling clay would be a great idea for making the figures. I was wrong. The chocolate was difficult to work with and crumbled easily. Also once it dried, it was hard and VERY brittle. Every time I looked at it a finger or arm would fall off. I'm sure there is a way to make this work, but I haven't found a website that exlains the tricks to me.

And after...I learned to use fondant for making figures, but to stabilize the body so the weight of the head doesn't smush the body. Also, Wilton Fondant is ick, ick ICK! NEVER use it if you plan on it being eaten.


For those of you that would rather buy their cakes and cookies, I'm glad you can afford it. For the few that would rather bake than buy, but don't have the time, call me and we'll work something out.
All in all this was a fun week getting all this together. Some headaches, but I think that Elizabeth caused that with all her screaming.
Thursday, January 14, 2010

Joker of cakes


So. For some reason I am having a terrible time with creating these cakes. I 8" round and 15 cupcakes are to be created for the shower in 2 days. I have burned the cupcakes and singed the cake. I'm not sure what is happening, but I know it's not my fault...

By the way, my new show premiers on the Food Network tomorrow...'Kulinary Kalamities with KrzyKramer'. It's sure to be a big hit.

Tuesday, January 12, 2010

Cake boss, I am not.

So. Chocolate modeling clay tastes good. I've eaten all my mistakes. I have comsumed 21 oz of chocolate/white chocolate so far. I don't feel good. Pants are tight.
I think my house is too cold to use modeling chocolate. It gets too hard to fast and breaks apart. I will try to use regular fondant tomorrow and hope for better results. I'll post a photo of my chocolate creation later. After I've cried myself to sleep. And digest...

Cake Boss, here I come!

Ok, so you know those fabulous tv shows featuring crazy awesome cakes? Well, Lily & I are addicted to them. I love how they create such beautiful things, only to be gobbled up for some wonderful occassion.
I must admit, I love to bake. Everything. Cookies, cakes, candies, it probably explains my weight gain...Since the arrival of my first daughter, I make it a point to create her birthday cake every year, and now I'm hooked. Every year the creations became more elaborate, with her 5th birthday decorated with hand made chocolate butterflies and caterpillars. I've got all the tools, spatulas, spinning trays, cake/cupcake pans, icing tubes, tips and papers. You name it I have it. Usually I only used wholesale bought buttercream (the same they use at Kroger, the wholesaler is around the corner from my house). It has a good flavor that kids (and Rob) like, comes in a HUGE 5 gallon bucket and is shelf save for 6 months.
Now with that being said, I love the look of those cakes on tv. The modeling and fondant is so beautiful. I've never liked the taste of fondant, it's pretty nasty. it's like eating a slab of Crisco with sugar added. Ick. I considered just making the pretty cakes Lily likes for her and let her discover the nasty-ness herself, but who wants to be dissapointed on their birthday with a gross cake? Until now...
I am co-hosting a baby shower this weekend and ofcourse offered to make the cake and cookies. I've been doing a little research and found this AMAZING site filled with great information, including a marshmellow fondant recipe. Hummm... I'm not a marshmellow fan, but others are, so I decided to make it today to sample it. OMG!!! is all I have to say. It's tasty, easy to make and did I say tasty? I am so excited now to create the goodies for the party this weekend! It was really easy, I'm now a fondant making queen! Now they did say it's not the best for modeling, but they also have the recipe for making modeling chocolate!! I whipped up a batch - tastes like a tootsie roll!! I know I'm going to have to beat Rob off with a stick for the rest of the week with these tasty goodies around. I'll post the final results on Sunday so you can see the yummy-ness!

Sunday, January 10, 2010

Lily's Creations

As I created my cards this week, I had a curly headed shadow peeking over my shoulder. On Friday, Lily had a snow day and begged me to make some cards. So I gave her some paper, crayons and markers and some stickers. She was not at all pleased with me. She wanted to make 'mommy cards' using stamps and the 'special' glue tape (snail). I gave her a stamp and her kid stamp pads and thought that would be the end of it. After about 5 minutes and 5 cards, she again said she wanted to make 'mommy cards' with me. So we used one card layout left over from a stamp camp I did a few years back. She loved the colors and using the paper crimper! Her creation is on the left, mine is on the right. We went thru step by step, I showed her how to do it, and she did it all herself. Did I mention she is 5?

After we made this card, she seemed to be satisfied, for about 15 minutes. She came back wanting to make another one. Since it was snowing out, I thought this was a great, easy card for her to make. She used blender pens, punches and a big background stamp too. I think we'll be doing this a lot more together now!

Inspire, not copy

This card is for the SCS Inspiration Challenge, IC214. This week’s inspiration comes from the fun Etsy store Groovy Inclinations. The artist is Mindy Wilson from western Montana. Her digital prints stem from illustrations and photos combined with alterations with a graphic program and her own painted textures. I choose the print Jelly Bean Soup for inspiration for this card. I do need to remember that it's supposed to 'inspire me', not to copy it. I made this card 3 time before I thought it was passable. I'm still not sure if I like it. I'm going to try a different print later today.


Card Stock: Whisper WHite, vellum, Soft Sky
Stamp Set: Embrace Life, Petal Prints
Ink: VersaMark, Craft White, Soft Sky, Basic Black marker, VersaMarker
Accessories: White, copper, black, non-su gold EP, sponge dauber

Scraps

I decided to use only scraps for this card. Every item came from my scrap bins of paper and ribbon. The strip of DSP Petals & Paisley inspired the color combination of this card. The only thing not froma scrap pile are the buttons.


Card stock: Whisper White, Certainly Celery, Old Olive, Apricot Appeal, Taken with Teal, DSP Petals & Paisley
Stamp set: Spring Solitude, Circle of Friendship
Ink: Certaily Celery, Craft White
Accessories: SU! markers, Certainly Celery, Old Olive, Chcolate Chip, Taken with Teal, Tempting Turqouise, yellow buttons, white EP, turqouise grosgrain ribbon

For Rob

I made this Valentines card for Rob, he's not a mushy guy. Just a guys guy. So I created a simple card with some elements I had made for another card I took apart last year. I love this color combination, simple and classic. I had to use 2 different verbage stamps to get the passage. I used the 'you' from the Short & Sweet set with a BB marker. This card took me all of 10 minutes to make.

Card stock: Soft Sky, Basic Black, Kraft
Stamp set: Garden Silhouettes, Lithograph, Warm Words, Short & Sweet
Ink: VersaMark, Soft Sky, Basic Black
Accessories: SU! marker Basic Black, Clear & white EP, sponge dauber, neutral buttons, non-su ribbon

Challenge me!

It has been forever since I did a SCS challenge. I love doing them, they help me think outside the box. Here is the one I did for the Tuesday Color Challenge, CC252, Bermuda Celery Hunters...cute title. I don't have Bermuda Bay, so I used Taken with Teal instead. I used the owl from Goody Goody Gumdrops - my new fav - and since I think he's so preppy, I used classic preppy patterns in the background.

Card stock: Certainly Celery, Taken with Teal, Handsome Hunter, Whisper White, DSP Certainly Celery
Stamp set: Goody-Goody Gumdrops, Pasley
Ink: Taken with Teal
Accessories: SU! markers, Certainly Celery, So Saffron, Taken with Teal, Handsome Hunter, Going Gray, blender pen, fire brads, retired velvet ribbon

Embrace Life

Here is one I made just for fun, but I had trouble with my embossing. It looks like I have speckles, but it's just the white gel pen I used on the stamped image.

Card stock: River Rock, Chocolate Chip, Certainly Celery
Stamp set: Embrace Life, Sage Sayings, versamark
Ink: River Rock, Chocolate Chip, Certaily Celery
Accessories: White gel pen, white grosgrain ribbon, retired brown ribbon, sponge daubers, white embossing powder.

Friends having fun!

My neighbor Karla likes to be creative, but with 2 boys and a full time job, has little time for it. She came over for a 90 break from the family and we did a little creating together. This was her first time stamping with me, and she's only ever been to 1 SU! party...poor thing! I gave her a crash course, and we'll be getting together again soon!
These are just 2 of the 7 we made together.
Olive You - I'm also using this as my sample for the SCS monday Clean & Simple challenge CAS48.

Card stock: Whisper White Stamp set: Olive You
Ink: Basic Black
Accessories: SU! markers, Certainly Celery, Old Olive, Always Aritchoke, Real Red, non-su red crystal.

Love U Always - I made this for a stamp camp at least 3 years ago, but Karla like it and wanted to make it.

Card stock: Whisper White, Rose Red, Green Galore, Gable Green
Stamp set: All About You, Too Terrific Tags
Ink: Rose Red
Accessories: Small tag punch, white grosgrain, red gigham, silver cording, silver brads, non-su red organza ribbon

Friday, January 8, 2010

Not picked..

Thank goodness, she didn't pick this one! It's cute, but I love what we did instead!


Card Stock: SU! Certainly Celery, Barely Banana, More Mustard, Whisper White, DSP (retired)
Stamps: SU! Goody, Goody Gumdrops, Polka-dot, Warm Words
Accessories: SU! scallop, 1 3/8" 1 1/4" punches, white gel pen, non-su ribbon

Shower Invitation

Here is the shower invitation I created. Vanessa likes polka-dots and the baby's room is green, ivory and chocolate brown. I plan on making the party to match the invites, so it will be adorable! I'm not into the typical baby stuff for showers, I like a bit of sophistication!


Card Stock: SU! Chocolate Chip, Certaily Celery, Whisper White, Very Vanilla, non-su ivory shimmer
Stamps: Goody, Goody Gumdrops
Accessories: Cuttlebug polka-dot, SU! scallop, 1 3/8", 1 1/4" punches, SU! font casual, non-su ribbon

Getting the juices flowing...

I have recently re-designed the configuration of our basement. I installed storage shelving, curtians, cleaned and extended my office/creative space. It's now a fun place to be again, so I'm gettin' busy with creating! Here is the first of several cards I whipped up this week. I had 2 great reasons for making these cards. First, I had an order for some generic baby cards, and second, I volunteered to help host my neigbor's baby shower (I can never pass up planning a party)! I made up a few sample invitations and what I didn't use for the shower, went to my customer! Talk about killing 2 birds....

Card Stock: SU! Barely Banana, Chocolate Chip Whisper White and Almost Amethyst
Stamp Set: SU! A Little Love & Polka Dot
Accessories: SU! scallop, 1 3/8" & 1 1/4" punches, non-su ribbon

Thursday, January 7, 2010

No, I'm not dead...

It's been forever since I posted, and nearly as long since I've created anything new! This last year has been crazy!

We have all done a bit of traveling. Michigan for Rob and the girls, Lily even spent a week alone in Petoskey with her grandparents. Florida for Elizabeth’s first birthday in Disney, spring training and a short girlfriend’s weekend trip for me early summer. I went to Seattle for my brother’s 40th birthday celebration and the SheRox tri-athalon with my mom and sister this fall. Of course a few trips to Perrysburg for baseball, visiting, and packing my parents up for their recent move to Bradenton, Florida.

Lily started ‘big girl’ school and loves Kindergarten! She impresses us everyday with her growing knowledge and is always asking questions. She is very dynamic and
entertains us often with her ‘Lily-isms’ and singing; she is rarely quiet! We are also amazed about how mature Lily can be at times, it can be hard to remember her as a little one. She defiantly knows her mind, and her teacher calls Lily a ‘future CEO’.

This year started off a bit rocky for our youngest, Elizabeth. Acid reflux and difficulty with breast feeding led to many sleepless nights for all of us. She grew out of it by summer and loved being outside playing and exploring. Now Elizabeth is a toddler, learning new words, walking and is very independent! She likes doing things for herself like eating and turning the pages in books, although she still allows us to read them for her, for now. She is giggling all the time and enjoys playing with her big sister and chasing the cat.

I spent most of the year just taking care of the kids, Rob and the house. It has been crazy how busy I am just doing those things. I am amazed at how some of my
girlfriends are able to juggle a job with being a mother. Now that school started for Lily, I spend lots of time with homework and volunteering in her class. I haven’t been focusing on my MaryKay business and hope to be able to next year part-time.

I don't sell Stampin' Up! products anymore, but ofcourse still buy them. I am still passionate about being creative, so I have decided to change the focus of my blog to all things creative. I get my hands into a little bit of everything and I'd like to share that, life experiences, as well as card making here. So I hope you enjoy, if you actually read this.

Monday, December 15, 2008

Happy Holidays!

Life is crazy!!! We have been trying to establish a good schedule for us all, so far.... Anyhoo, we've been getting ready for the holidays, baking, Christmas cards (no creations, newletter instead) cleaning, you know the drill. Here is a little photo montage for the holidays, so enjoy!

Click to play Happy Holidays!
Create your own scrapbook - Powered by Smilebox
Make a Smilebox scrapbook

Thursday, November 20, 2008

Our little pumpkin

Well, she's finally here! It's been a while since I updated this so here it goes...

Elizabeth Grace was born October 3rd at 8:00 am. via c-section, she was 9 lbs 10 oz (a little smaller than expected) and everything went as planned. However, if anyone tells you that a c-section is easy (yes Cristy, I'm talking to you:)) hit them for me. It was the scariest experience! Obviously totally worth it and the recovery time is a piece of cake, but the actuall surgery, yikes! Check out all our photos from the first week here Anyhoo...It's been a bit tougher than expected balancing both kids, the house and my business. Motherhood as eliminated all my free time, so I haven't been doing any card making or MaryKay.
BUT... I have just finished my yearly projects for Cameron Mitchell Restaurants. If you haven't heard of them, they are a FABULOUS restaurant chain based here in Columbus. THey used to own Mitchell Fish Markets and Mitchells' Steak Houses, but Cameron sold those concepts off last year to Ruth Chris' Steakhouses and another company as well. Now he is focusing on creating new concepts to open, so far my favorite is Marcella's - YUMMM. Check out all I did for them HERE. It took quite a bit of time to create the items for the 15 current stores and they already have me slated for more for next year. I will be decorating my house for the holidays this weekend and life will slow down hopefully enough that I will be able to actually make my own christmas cards this year. I promise to update you on my creations as soon as I do them.
Hugs and thanks for all your well wishes!

Sunday, September 14, 2008

Why I haven't been creating...

Don't get excited... the baby hasn't come yet. I was hoping my doctor would have scheduled a c-section for me sometime soon, but no such luck. My cervix is thin but won't open due to the scar tissue from multiple past procedures. That was a plus earlier in the pregnancy, but now... not so much.

Although I am not diabetic, the baby is now apparently 8 lbs, 12 oz (mini amazon) now, but it could be a pound either way, so she could be 9 lbs 12 oz, or 7 lbs, 12 oz. (if I'm lucky). I still have 4 weeks to term, and at this stage babies generally gain about 1/2 lb+ a week so she will probably be a 10 lb + baby. My doctor is unwilling to induce early or decide to do a c-section until we get closer to the due date due to possible complications.

I am very huge, very uncomfortable, and VERY ready to have my body back. I am still on limited activity, but have been doing everything short of jazzercise if it means I will go into labor. I haven't been doing much of anything creative, just trying to get my house in order before the baby arrives.

Rob has been a HUGE help these last 2 weeks and continues to make me sit or lay down all the time. He has put up with a lot from this pregnancy. Overall this is easier than Lily's pregnancy, but the last 2 weeks have been difficult and we are bummed that we could have 4 more long weeks (at least I am). As long as we are all happy and healthy at the end, it's worth it.

I promise, I will TRY to get to creating soon. I miss doing all the SCS challenges as they keep my mind thinking outside the box. Please be patient...I will return!!!!

Monday, August 25, 2008

I know it's not cards...

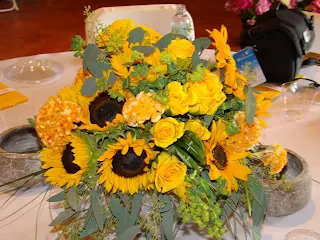
But I've really been busy! I just spent the last week preparing and planning my girlfriend's - mom's wedding. It was so much fun to get back into the Special Event planning hat for a week. It kind of makes me miss working in that field...kind of. Being 34 weeks pregant and creating 16 centerpieces, altar pieces and bunches of misc. items for the event made me EXHAUSTED by Saturday night. But it was totally fun, not that I'm ready to do that work full-time again.

Here are some crummy photos of the flowers I did. Each table was a different color or red, pink, purple, yellow, orange and green, with coordinating napkins and accents.


The altar had two lamp posts decorated with flowers on either side. It had a "street" theme.

My camera didn't do a great job capturing the essence of the room. The place for the event was called Snook's Dream Cars in Bowling Green. Ohio. It is a quirky little car museum that could have been really cheezy, but was done with great attention to detail and I loved it! They have done a great job getting not only beautiful antique cars, but have set up a great atmosphere and other car related memorialbilia and antique games that feature a car theme. My husbands favorite was the Drunk-o-Meter, that shocked you based on how drunk you are and how well you play the game. He is now commited to finding one for his "man cave". If you are at all into cars - which I am not - or even have someone in your life that is, check this place out next time your in town. It's a quick visit.
All in all, it was a great time, the bride and groom are in love, too adorable, and enjoy each other's company, what more can you ask for?


Monday, August 18, 2008

Off of cards, for the week...

I know it's been a while, but I haven't been making cards this week. This week I focused on gifts for my BFF's little sister, we are both pregnant with girls and due only 2 weeks apart. So I spent this week creating things for her to give her at her baby shower this past Saturday.
The first items are a set of custom onsies. The one shown is the one I liked the best, it makes me giggle. The image is an iron-on from Joanne's - too cute eh? I stamped the words 'little stinker' with whimsical lower case stamps and craft ink. I thought about using the Stazon...any suggestions? On the back, 'big' is done with Big Deal Alpha and pink fabric paint - the craft in light colors tends to dissapear after 1 wash - and 'stinker' again with the black craft. I made 3 others for her, one with her name 'Natalie', 'princess' and the last, 'Q-T'. All of them had the cute stick figures on them.

The last item I made for her is this...
I am SO impressed with myself. I made it late one night and almost had to wake my hubby up to admire my work! I also had to make another one for my bundle of joy 'cause it's just so darn cute!!! I have now purchased tons more fabric to make more for her and Lily, so they match. Now I can see why my mom had so much fun dressing my sister and I alike.
Well that's it for now. I promise to get back to stamping this week!

Sunday, August 10, 2008

A night of fun

This card so so outside my norm but I really liked how it came out! I spent the evening creating for some me time. I worked ahead of the group (my teachers would be so proud) and did the Verve Anniversary challenge AVS10 early, then realized I couldn't post today. So much for being the early bird!

I'm in a Designer Paper (DP) mood tonight, so the striped paper inspired the colors for this one. The colors used are Certainly Celery (CC), Ruby Red (RR) Pumpin Pie (PP), Perfect Plum (PP2), and lastly, yes it's true, some of it still exists, COOL CARRIBEAN (CC2)!!! I am a paper horder you know. The main panel of RR (run thru the Cuttlebug) and the DP is layered on CC2 and CC with ribbon from Sorbet wrapped around the middle (I wish I could get 10 yards of this stuff!). I layered on 3 panels of PP (again run thru the Cuttlebug) over the ribbon. The sentiment is from 'For a Friend' inked with RR and Lavendar Lace markers. The flame is some 3D glue I got from Michaels with some glitter on it. That is layered on CC and CC2. Finally I added a 1" circle of PP2 with a circle of white uniball ink (traced around a 3/4" circle) cut it in half and added it to the corners. I never would have come up with this sketch on my own, so its good to try something new. I really liked how it came out!

Easy Peasy!

I think this may be my favorite one I did last night, although the photo came out blurry. This is also for the Verve Anniversary challenges, AVS09.


I was inspired by the Designer Paper for this one. The colors are Kraft (K), Certainly Celery (CC) Pumpkin Pie (PP) and...wait for it...Cool Carribean (CC2)! I know you are all jealous, I have a huge stash of it still! The striped DP and the paisley DP are layered on CC and CC2, all placed on a K card body. I wrapped the layers with ribbon from Sorbet. The sentiment from 'Happy Harmony' is stamped with Close to Cocoa on Whisper White, then layered it on PP, CC, CC2 and K. I added a flower from the Pretties kit colored with So Saffron and Apricot Appeal then added the gold bling! Super easy peasey!

Shall I dare?

I'm on a mission! I'm going to do all the Verve Anniversary challenges! This one is for AVS05. I've never made a long card before so I'm not sure of what dimensions to use. I know I'll have to make my own envelope for this one.

I used Regal Rose (RR), Pretty in Pink (PP), Rose Red(RR2) and the new SU! In Color Pink Pirouettte (PP2). I started off my embossing with white EP 3 images of the flower from 'Dare to be Fabulous' on RR, PP and PP2. I cut them out with the PP2 the smallest flower, PP the medium flowr and RR the largest flwoer. It is put together with dimensionals and I added 3 pearls to the center for some glam. The flower is layered on PP2 stamped with 'Filagree' then layered on RR2 and RR. The main background is all on RR. I stamped the next layer of RR with the 'Polkadot' background stamp with RR ink and embossed the sentiment in the bottom left corner with white EP and colored in the word with RR and RR2. The center layer is PP2 stamped again with the 'Filagree' background stamp and layered on RR2 with the bottom edge punched out with my SU! scallop punch. I added the holes with my 1.8" punch. RR grosgrain ribbon was wrapped around this layer and I added a bow with a mini glue dot.

So how confusing was that with all the RR's and the PP's?

Funky fresh

This is another one I did last night, its for the Verve Anniversary challenge AVS07. I used only designer paper on this one. I love this paper, its so vintage, cool and fresh!


The bright Designer Paper (DP) inspired the colors of this card. I used So Saffron (SS), Elegant Eggplant (EE) Regal Rose (RR), and Soft Sky(SS). The 1st layer is the SS DP prints from SU! layered on EE. I then wrappes SS ribbon around the bottom and added a bow with a mini glue dot. The fun DP is layered on SS and EE. I used my scallop punch to do the bottom edge of the EE then layered RR behind it for extra color. The sentiment is from'Sincere Salutations' on Whisper White paper with EE ink, then sponged with SS around the edges. That is layered on SS, RR and EE. I added a flower with a pink brad for fun. It's not my favorite card, but it's cute.

Polkadot Imperfection

So as I sat up creating for a while last night, I started off with a bang, and ended up at a whisper. Let me show you...
This card was the last one I did, it's for the Verve Anniversary challenge AVS06. Notice how the words are not center in the circle, and how my brads on either side have a different placement? I think I may have dosed off while making this one. Anyhow, I used SU! colors Basic Black (BB), Certainly Celery (CC) and Old Olive (OO). I stamped the OO with the Polka-dot background stamp with OO ink, then wraped the corners with a wide black and white polka-dot ribbon. I layered that on BB. The center circle is from 'Sage Advice', it's probebly one of my favorite quotes. I stamped it with Versamark on CC Designer Prints paper and cut it out - incorrectly- with my Colluzle (I don't have Nestabilities yet). The scallop edge is from Quickutz and I cut out BB, then made more polka-dots with my uniball white gel pen. The side panels is the ribbon and I used my Crop-a-dile to punch the holes for the brads. I didn't notice the brads were off until after I had finished the card. Oh well! The whole thing is on a Whisper White card body.

Saturday, August 9, 2008

Verve-a-licious!

I have to say that I love all the images made by Verve Stamps. They are cute, fresh, stylish and fun! I just wish I owned some...but alas, with baby #2 only a few weeks away, my stamping budget is being spent elsewhere. I do enjoy receiving Verve updates from Poetic Artistry, a blog by the company's owner and stamp designer Julee Tilman. Last week was the companies first anniversary and they were having card challenges everyday. Since I was out of town, I'm doing them now.


I made this card for my BFF younger sister, who is having a baby girl (just like me) on the 15th of September. I can only hope my baby decides to come that early, as she is due October 8th, but is likely to arrive early.
I made it using the Verve sketch AVS02, and I used Whisper White (WW), Pretty in Pink (PP), Regal Rose (RR) and 2 designer papers(DP) from Memory Makers. Its a square card, which I almost never make, so it was a great challenge for me. The card base is WW layered with PP and RR. The striped DP is scalloped using the SU scallop punch with holes punched out with the 1/16th punch. Those layers are then wrapped with a retired SU! ribbon (I'm a ribbon and paper horder). The next layer is made with the green polka-dot DP again, punched with the scallop punch, I cut the square in half and attached it to a piece of RR. I layered clear(backed with PP), green and clear green buttons on the RR with mini glue dots around the edge. I then attached my sentiment (For a Friend) which was stamped with Always Artichoke ink and colored in with PP and RR markers, layered on Old Olive paper. I attached the sentiment with 3 layers of dimensionals above the buttons and added PP buttons on top. Finally I made a knot with the retired ribbon and attached it with a mini glue dot.

I'm planning on creating some special gifts for her, as she lost her first baby 3 days after she developed toxemia and had to deliver at 25 weeks early last year. This new baby for her is a gift from God that will be spoiled like the princess she will be!!!

It feels like spring...

Well, I'm back from our last vacation of the summer...it was a long one for me! A week in Petoskey Michigan (fabulous place and weather!) then 3 more days in Perrysburg with my parents before they left for Seattle for 5 1/2 weeks! Whew...now that I'm back, I'm following Doctors orders, doing things that keep my stress level to a minimum for baby's sake :). So that means stamping (No arguement here)!
Here is one I did for last weeks SCS color challenge 177, Groovy Guava (GG), Whisper White (WW) and Sahara Sand(SS). I of course added another neutral (well, what I consider a neutral), Chocolate Chip(CC). The card base is an A2 card of SS. The bottom layer is SS stamped with the wheel from the Spring Solitude Bundle inked with SS. I sponged the edges with SS and layered it on GG with the bottom edge punched with the new SU! scallop punch (love it!) and polka-dots with my unibal white gel pen. I wrapped the layer with a wide white grosgrain ribbon I have. The second layer is on SS stamped with the Spring Solitude solid flower stamp with SS ink, then I used Versamark with the flower outline stamp to emboss with white EP that over the other stamped images (does that make sense?) My embossing buddy failed me this time, as there are TONS of white EP flakes everywhere. I stamped the sentiment with SS marker and Versamarker and embossed the word 'you' with white EP. The panel is sponged with SS around the edges and layered on GG. I then attached that to the 1st layer and wrapped it with CC grosgrain ribbon. The final layer I used the branch stamp, inked with CC marker and SS marker and stamped it on SS, then stamped the bird with Versamark and embossed with white EP. I punched the image out with my 1 1/4" square punch and sponged the edges with SS, used my 1 3/8" punch with WW and cut out CC to frame this. Finally, GG is punched out with my Marvy scallop square punch with white polkadots again around the edge and I added a CC grosgrain knot with a mini glue dot. I have to say that I really like this stamp set, it's a shame it to me so long to get it!

Saturday, July 26, 2008

Double-ly adorable!

I had some time after the birthday party, so while Lily was sleeping and I was doing laundry, I made this card. Talk about multi-tasking!


This is for the SCS card sketch challenge #186 this week. I started by selecting a stamp set that would complement the strip along the bottom of the sketch, so I picked out Double Line Doodles (retired SU!). I stamped the long strip first on Certainly Celery with CC ink, then highlighted the image with my uniball White gel pen and Old Olive marker. I layered that on Old Olive paper and using scalloped scissors, trimmed the edges down the length of the paper. Next I used another retired SU! item, the background paper (don't remember the name) and layered that on CC and Always Artichoke. The second panel is the SU! DS Print paper in Certainly Celery, layered on Old Olive. I stamped 'adorable' from Warm Words with Always Artichoke, 'cause she's adorable! The main image from the stamp set is stamped on Whisper White with Always Artichoke, then sponged with CC and OO. I then cut out the center if the image and featured a photo of Lily behind it (isn't she cute!). That is layered on CC and AA trimmed with the scallop scissors (I don't have the Nestabilities yet) and I put white polkadots around it with the white gel pen. I added Moss grosgrain ribbon under the image and attached it with dimensionals. That's it! Thanks for looking!!

Emma's Birthday!

Lily's best friend from preschool, Emma had her Cinderella birthday party today! Lily had tons of fun with her friends from school playing princesses, swinging and picking flowers (aka weeds). We got Emma a Sleeping Beauty dress for her upcoming trip to Disney World, but this morning I decided I needed to make something a little extra. So in about an hour and 15 minutes, I came up with this collection of goodies for her next year at preschool!


This doesn't have any SU! products in it, so I can't explain what everything is and where it's from, but I can explain the process. The lunchbox is from the Target $1 spot, about 2 years ago (I hope they do them again this year). I used ModPodge to attach the paper with rounded corners to the front and the back. I usually do the whole name, but this is a small box and it didn't fit. So instead, I added her inital with a pre-made chipboard letter then applied ModPodge to the whole thing to make it water proof. Then embellished it simply with a prima flower, button and ribbon. The handle had ribbons tied to it in an array of colors. I made a crayon box slide with the same paper, punches and the retired SU! letter set letter dots (I don't think that's the name). The little pad of paper (its only 3.5"x3.5") has the same paper, chipboard and embellishments as the lunch box. Tosssed in a few pens and pencils and voila'!

Tuesday, July 22, 2008

It's a boy!

I just found out this morning that my girlfriend Carrie is having a baby boy! Just what she wanted! It's been fun being pregnant together. Now that we are both getting bigger, we bumb bellies when ever we see each other. She is about 2+ months behind me. I decided to make another card for her using the colors of the card challenge CC176. Its a fun combo!


I did add Chocolate Ship to this one also, even though it looks like black. I need to work on my camera... Anyhoo, I used a retired SU! paper (I don't remember the name) that is acutally Mellow Moss, but I thought it was close enough, and I sponged the edges with River Rock. The lower panel is River Rock, run thru the Cutllebug and both were layered on a piece of Chocolate Chip. I put a strip of Soft Sky stiched ribbon at the 'joint' with a knot attached with a mini glue dot. The main image is from Very Punny (minus the pun)on Very Vanilla, colored with SS and RR using a blender pen, and added So Saffron to the scallop. I sponged the edges and layered it on RR, SS and a Chocolate Chip scalloped square using my Marvy punch. All this is on a VV card base. Sweet and simple!

Look Familiar?

I really love Soft Sky, it's a shame it's being retired. I'm getting a bunch of it before it goes though. This is for the SCS color challenge CC176, and I actually finished this one within 12 hours of posting! That's a record for me.

The colors for this challenge were Soft Sky, River Rock and Very Vanilla. Its a lovely, soft combination. This is the same layout I did for the Mojo Monday #44 last month, it's very versatile. I started out with a Chocolate Chip card base, I know it looks like Basic Black, but it's not, its Chocolate Chip. (I cheated I know, but I like a little more contrast) and layered on Very Vanilla with a River Rock panel that was Cuttlebugged. On that, I added a Soft Sky panel, stamped on Script in SS and sponged the edges, then layered it on VV. The 3rd panel is the textured River Rock paper with sponged edges and layered also on VV. I added a strip of Soft Sky stiched ribbon on that as well. The main image is from Embrace Life, stamped in Chocolate Chip, with the flowers colored in with my uniball white gel pen and highlighted with SS using my aqua painter. I sponged the edges and layered it on RR, SS and CC. The scallop is SS with CC dots, then the sentiment is stamped on VV with CC and Script stamped over it with SS and sponged around the edges. I didn't have any embellishements in that great Chocolate Chip color, so I had to settle for Close to Cocoa buttons with a thin strip of River Rock threaded thru the holes.

Monday, July 21, 2008

A little suspense...

This card I just made, it's super easy and cute! It's for the SCS technique challenge TLC176. I had never made one and really think it's adorable, the directions are the the link, so check it out! I did however drop my stamp on the front after I had finished, since it was late, I didn't do it over.

Front of spinner

Back of spinner.

I used Whisper White card stock for the card body, then tied the wide black polka dot ribbon around it and tied it off with a bow. Sorry the photo is off. I punched the scallop circle punch in the bottom right corner. The spinner is the ladybug from Very Punny, stamped on WW with Basic Black, and colored in with my aqua painter and Real Red ink. The other side is stamped with the 'thank you' stamp from Short & Sweet, outlined with the real red marker. I added dots around the edge with the Basic Black marker. The image and the sentiment were punched with the 1 1/4" circle punch and layered together back to back with a piece of red thread between. On the inside of the card, taped the ends of the thread to the back of the front of the card and placed a Real Red piece of card stock and with a punched a 1 3/8 circle out of that. Added some white polka dots and voila'! Sweet and simple!

Not so groovy...


Since I don't really like this card, I won't get into the specifics. It's for the SCS card challenge SC185 and color challenge CC174.

Christmas tags with SOC!

Hi all! It’s the crazy holiday season but you still need to create!  Join us for Sisterhood of Crafters challenge this time around.  It’s an...