
All right peeps! Grab a cup o' joe, a snack and get comfy, I'm going to entertain you....hopefully....with some creating goodness!
I have been squeezing in crafting time these last 2 weeks to complete my 'Final Exam' for the Altenew Educator Certification Program, and let me tell you , it was QUITE the challenge!
For this exam I had several requirements I had to adhere to. First, create a his and her Card Set as a gift set. Ok...now for inspiration....I decided to create one gift set for my sister-in-law and one for my best friend. They both had their youngest fly the nest this fall and head to college. The gifts have cards for them to send to their newly released youngins into the wild...One boy, one girl. CHECK.
Next, select ANY 3 components from the classes in Level 1. Well, I'm extra, so I did more than 3....hope that's ok....I used 11 to be exact! From the Easy Die Cutting Techniques; Dry embossing, ink blending using a hand crafted stencil from a die cut, along with a little bit of negative die cutting and inlaid die cutting. From the Easy Ink Blending and Irresistable Ink Techniques classes; ink blending with a brush, direct to paper inking, painting with ink pads and emboss resist. From the Seasonal Scene Building class, a shaker element. Finally from the For the Guys classes, using geometric elements for masculine cards. Whew! CHECK.
Then, share some design tips. I mostly have tips for making creating easier, which I talk about in my video. CHECK. Each card set should consist of 4-6 cards, each has 6. CHECK. Use one recycle element on a set or its packaging, I chose to use it for the packaging, CHECK.
Challenge blog post...here it is!....and a detailed step-by-step photo tutorial and/or YouTube video. My video skills need major refining and I NEED to get a camera for this....and perhaps a 'how to' class!....but my trusty iPhone did the trick. CHECK.
FINALLY....Submit to the gallery by 10/11. That has been the hardest due to a crazy life, but here I am! Just under the wire....
Wanna see them? Here are some photos of the card sets.

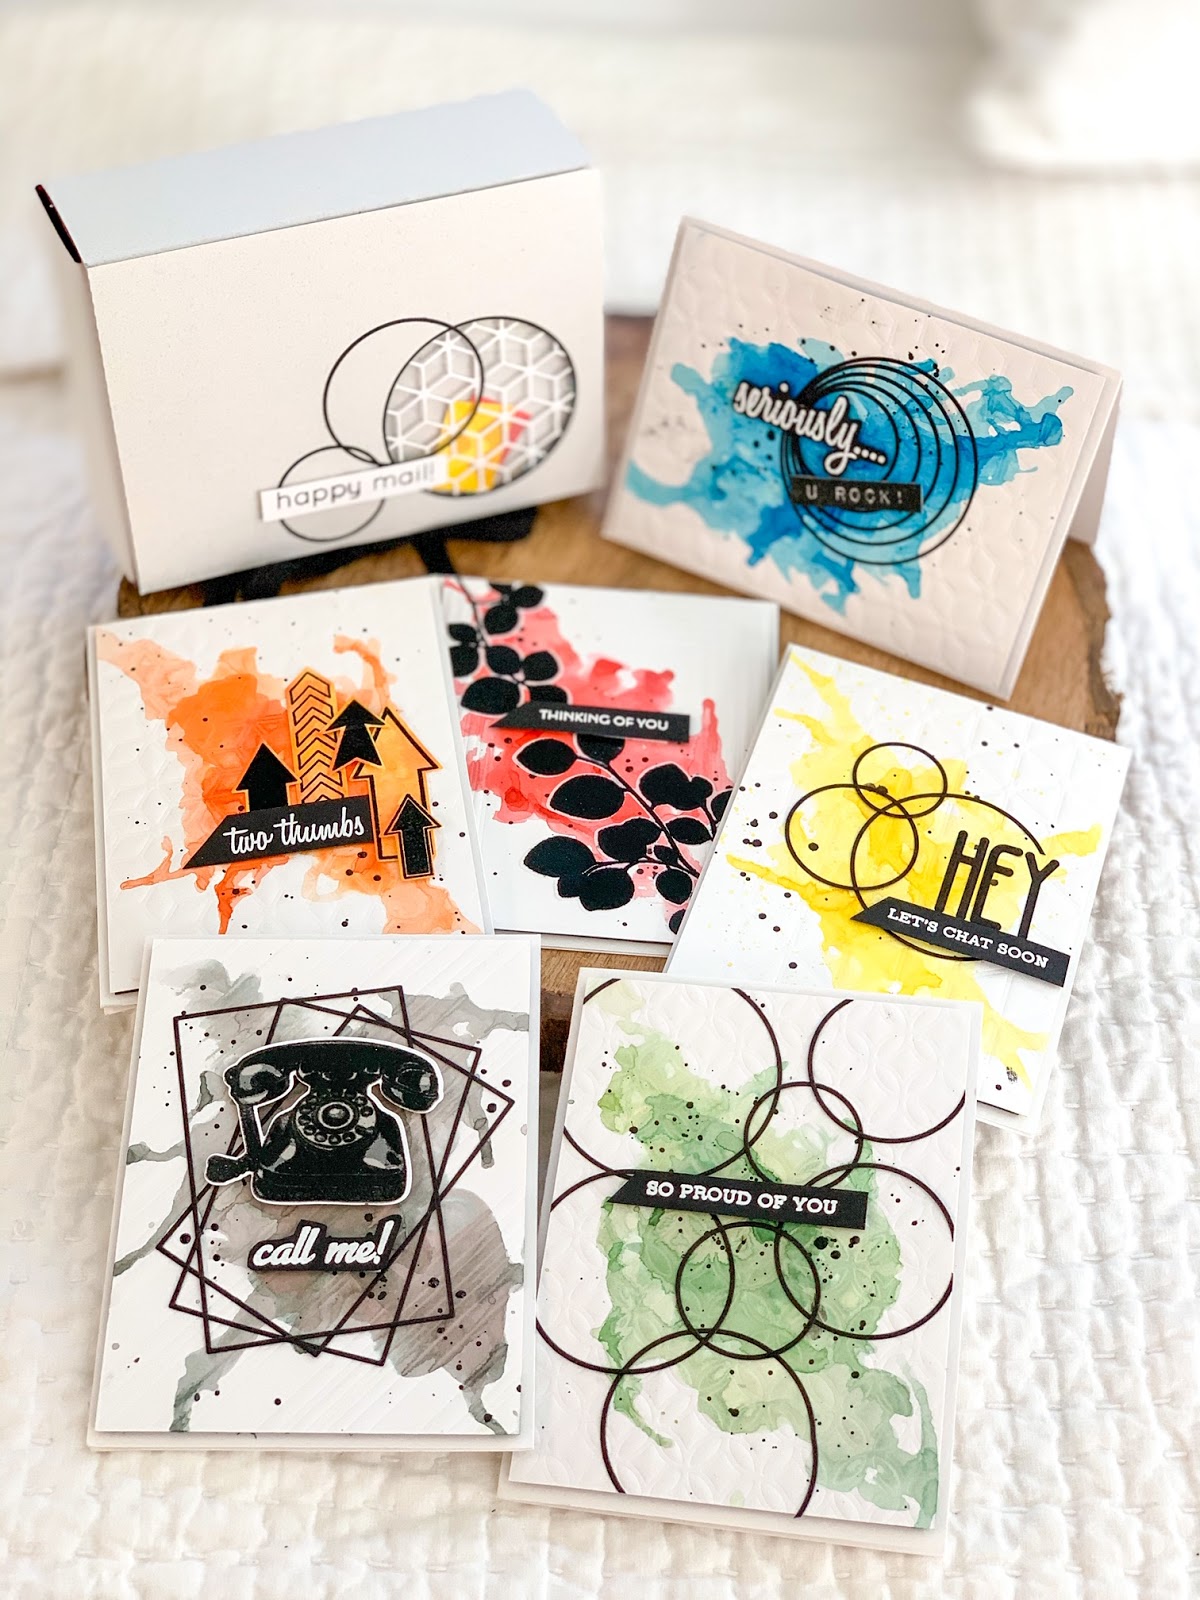 |
| The Masculine set - grungy and graphic! |
 |
| The Feminine set - soft and pretty! |
Here are the photos of the cards from both sets as well as side by side photos of the cards with their 'sibling'. ....I've added the supply list below the images, all products are Altenew unless noted.... First up "Hey, Let's Chat Soon" to remind them to call their mothers!
 |
| Layered Snowflake Die B; Happy Mail & Sentiment Strips; Tall Alpha & Fine Frames Circle dies |

 |
| Candy Cane Strip, Tall Alpha and Virginia Rose dies; Sentiment Strips & Happy Mail stamp set |


 |
| Happy Mail, Label Love and Bad Days Happen stamp sets; Fine Frames Circle and Layered Snowflake Cover A dies |

 |
| Happy Mail, Label Love and Bad Days Happen stamp sets; Fine Frames Circle, Virginia Rose and Layered Snowflake Cover A dies |


 |
| Fine Frame Cover and Leaf Canopy dies; Happy Mail & Leaf Canopy stamp set |

 |
| Layered Snowflake Die B; Happy Mail & Leaf Canopy stamp sets |


 |
| Layered Plaid A & B and Follow Your Arrow dies, Follow Your Arrow and Bad Days Happen stamp sets |


 |
| Circle Quilt Cover and Fine Frames Circle dies, Happy Mail and Sentiment Strips stamp sets |

 |
| Circle Quilt Cover and Fine Frames Circle dies, Happy Mail and Sentiment Strips stamp sets |


 |
| Candy Cane Stripe Cover, Fine Frames Rectangle and Its For You dies; Happy Mail and It's For You stamp sets |

 |
| Layered Plaid A&B, It's For You and Fine Frames Rectangle dies; Happy Mail & Its For You stamp sets |


Aren't they cute? Now the recycled packaging was....excruciating....a challenge. I usually just alter containers, but decided to build my own boxes....it was not a good choice....

I had cleaned out my closet and found an old market bag with left over file folders from work. All of them had writing or papers glued to them and I would have just pitched them...BUT with this project in the back of my head, I decided to use them for my packaging.
Let me start my saying, I am not an engineer. Or much of a builder of boxes. I only have 10 folders left....I think I may have had 25+ when I started..... It took a TON of trial and error to create these suckers...and I love them! Each of the boxes have a shaker element to them as well as a very simple design in relation to their decoration.
The box for masculine set was fairly easy to design with the dimensions I needed. The outside is covered in a pale gray cardstock and the inside was covered with red cardstock. Having 3 thick layers did make folding difficult, but not impossible.


The plastic from the shaker cards is recycled too! It came from report plastic covers, you know the kind. Like the ones we used in elementary school to cover our book reports? Yup, those...
The feminine set was more of a challenge. I wanted to use just 1 large piece to create it, but file folders are only 'so' big, so I had to divide up the base into multiple pieces to create it. The outside is covered with a basic white cardstock.


That's it! I hope this was a relaxing and inspiring visit....and your coffee didn't get cold....


