Hi y'all!

I am here today to show you some really fun stencil techniques! I am continuing my journey with the
AECP today. The class I just finished was
Celebration: Stencil Techniques. I have recently developed a strong affection for mixed media papers. I love using stencils while making these, first they're affordable; second, they're versatile, and lastly, they're just fun!
I've created 2 cards for this class, and my Very. First. Video!
....YIKES!!!.... But lets get started on how to create these cards.
This first card, uses the
Altenew On the Plus Side stencil to create the background. First the stencil is laid down on Cool Caribbean card stock and inked it with
Altenew Sea Glass ink. It was simple
....aka not extra....and needed something a little more. Then, using a translucent matte medium, the stencil is shifted over and the medium is spread over the stencil. Quickly removing the stencil after, it is sprinkled with a super fine glitter with lots of shimmer and sat aside until it dried.
I LOVE how it came out! The shimmer is so lovely. I mean, photos don't do it justice....
With such a beautiful background panel, it needed to be finished off simply, using the flower and leaves that were inked up while creating the second card. More on that in a bit. Next, a sentiment from the
Wonderful Wycinicki was heat embossed with white on black paper, then assembled all together and mounted onto a black card base to compliment the sentiment strip.
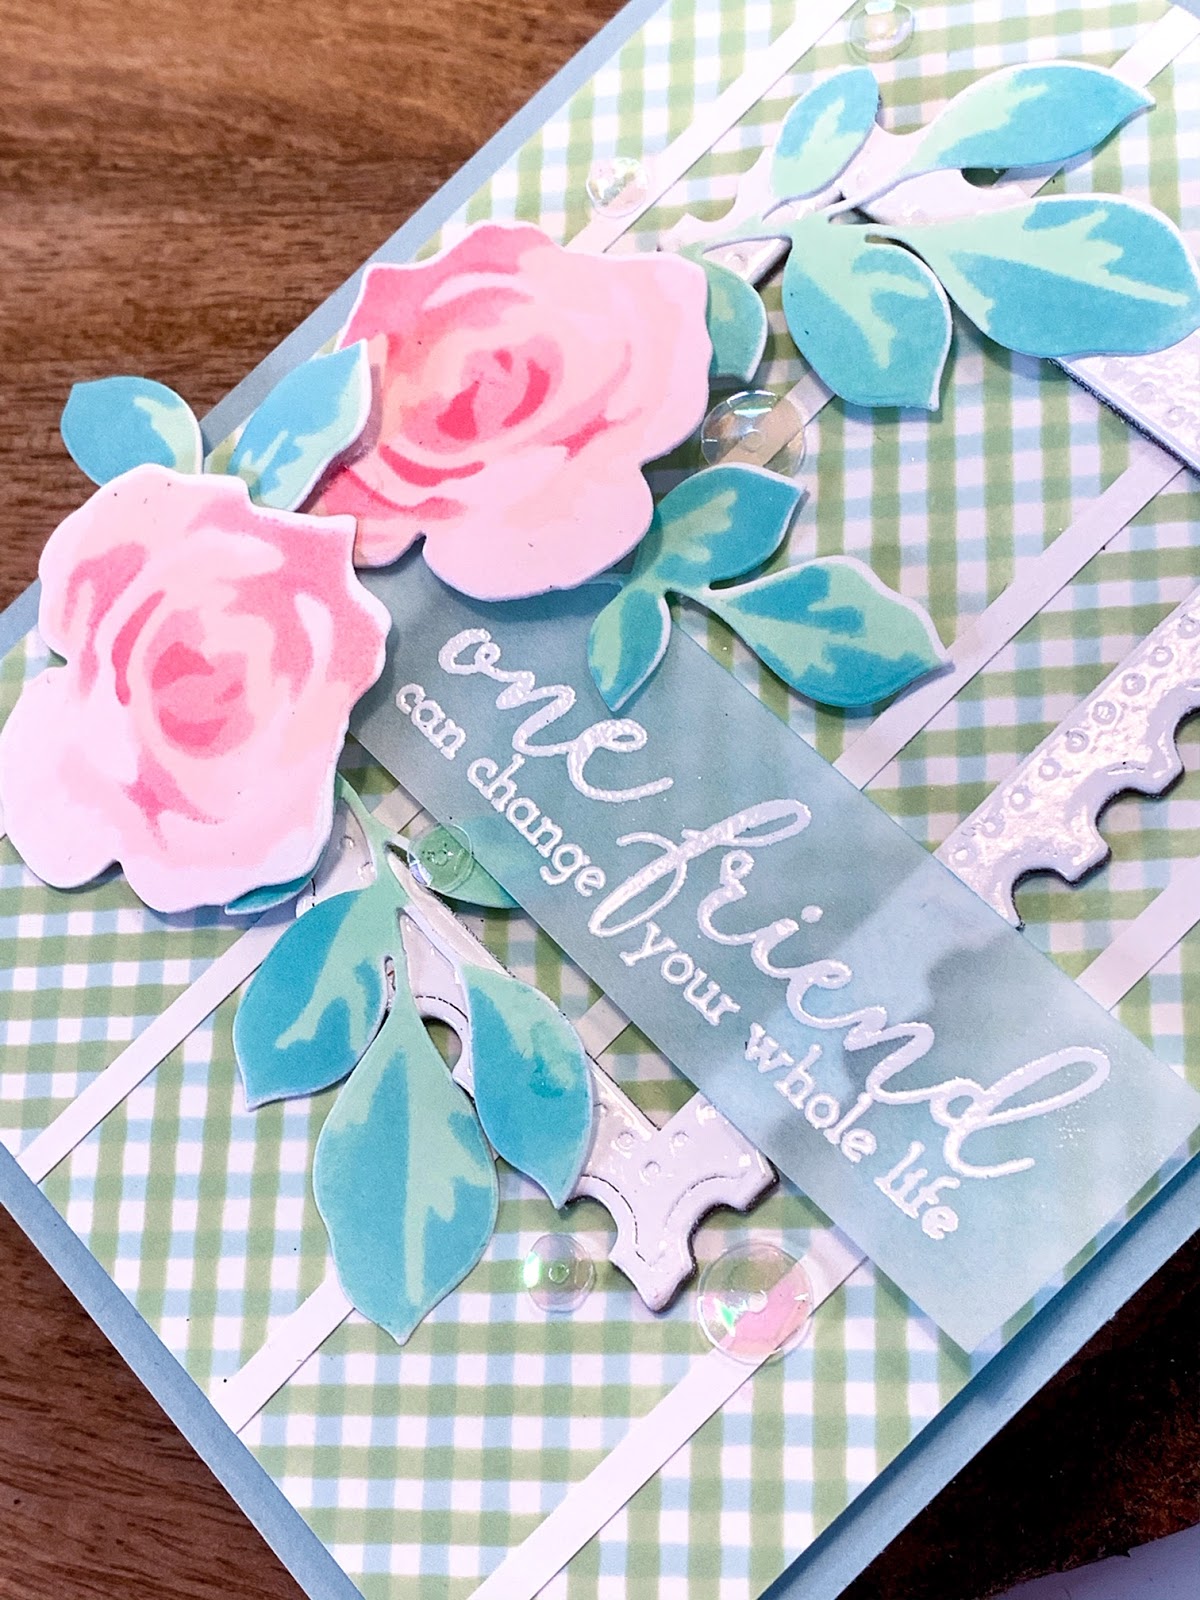
My second card, I stenciled the ba-geezses out of it!
It started by stenciling the background using the
Buffalo Plaid Builder stencil by Altenew using a sponge for ink blending with Sea Glass ink. After completing the blending, the stencil is flipped it over so it would create a herringbone pattern. The process is repeated in the
opposite direction using
Frayed Leaf ink. This created a lattice/gingham type pattern. Due to the nature of the stencil, it leaves a small white stripe, which was covered with a simple thin strip of white paper. It looks like a room at the Greenbriar Resort! So soft and pretty.
Wanting to keep the foreground with the flowers as soft as the background, I decided to try stenciling them. I actually used the
Garden Pick 3D flower die set for this. I thought it would be too difficult to explain the process, so below is the video explaining how I was able to create them.
The card is finished off by using a chipboard frame I've had in my stash for ever! It was inked up with Versamark and heat embossed with white powder. The flower and the leaves
....using the same process as the flowers....were then assembled over the frame and a sentiment strip on vellum was created with the
One Friend stamp set using white embossing powder. The back of the strip was inked with Sea Glass ink to make the sentiment pop!
Ok! On to my next class!
Have a colorful day!


2 comments:
So you can do both bold, colourful to subtle and airy gorgeousness! So stunning really! These cards look amazing! I know you know how beautiful they look and I am sure they look even more amazeballs in person.
Love the stenciling, love the sparkle, love the two-tone inking. love the colours, the layout. love everything!
Thank you for blessing my eyes and entering your gorgeous work to the AECP assignment gallery. Bravo!
Omg! I’m so humbled! Thank you so much for your sweet thoughts!
Post a Comment