 I've done it! Completed my final class for the Level 1 AECP. This program so far has not only been fun, but it helped me re-visit some techniques I hadn't done in a long time, and to use them in a new way. I highly recommend checking them out!
The final class, Irresistible Inking Techniques is a great re-fresher! I used all four techniques on the cards I created.
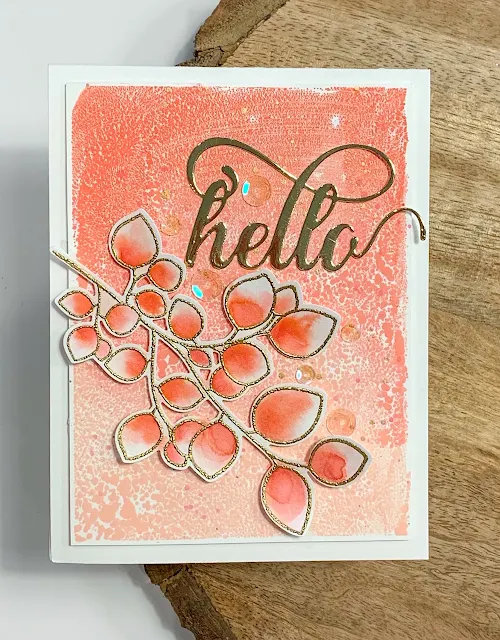
The first cards, I made together using a piece of acetate to create the ombre background. I LOVE how they came out! I need to remember to use this technique more often. I used the Tea Party and Sweet Dreams with color ink sets and Bamboo ink.
The leaves from the Altenew Leaf Canopy set were stamped and embossed with gold, then die cut. Using the same colors from the background, I used the inks as water color paints. The embossing helps to keep the puddles of water in their respective leaves which made the painting even easier. I originally was going to use the contrasting leaves on the backgrounds, but at the last minute decided to go monochromatic. I'm glad I did! Having the contrast was just too much and fought each other.
I splattered the background with the darkest color from the background and some gold shimmer water color paint. The sentiment was die cut with the Altenew Fancy Hello die with gold mirror paper. Everything was completed with a few sequins for some shimmer! I'm entering these cards in the Global Design Project challenge for this week, Bloom and Grow; and the Simon Says Stamp challenge Monochrome.
The second card I used the direct to paper technique for the background. Using the color inks from the Warm Grey color ink set. I rubbed the pads in straight lines to give the illusion of wood planking. I continued the process with the 3 lightest colors.
I felt the background was lacking, so I used my Broken Chevron stencil to complete the wood background by inking the stencil and placing on the inked background. I finished off the card with a painted die cut from the Leaf Cluster set and wood branches from the Create a Wreath die set.
The sentiment is stamped around the edges of the card, with the 'you are' beginning each of the statements.
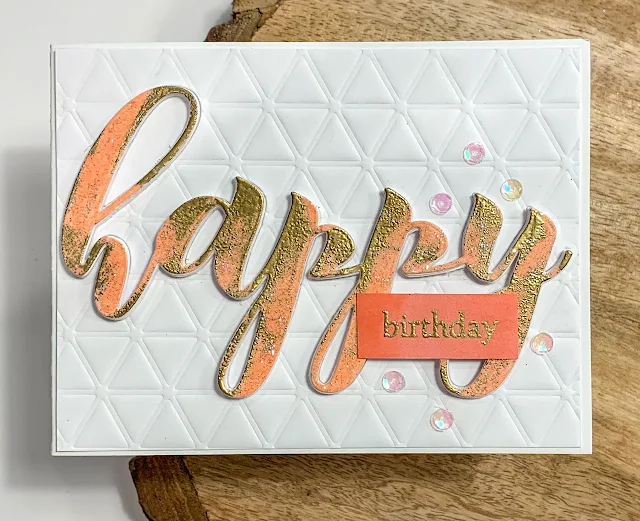
The final card uses the direct to paper technique. The Mega Happy sentiment is die cut from a white cardstock panel. The remainder was then dry embossed with the Layered Snowflakes Die B.
The sentiment was then subbed with a Versamark ink pad, and embossed with gold powder. It was then rubbed with a Pink Pearl ink pad. Its a great technique if you want a specific color of paper. I repeated the process with the 'birthday' sentiment as will using the Coral Bliss ink pad.
The card was finished off with a little stardust glitter glue on the sentiment and some sequin embellies.
Well, that's it! I now am waiting for my assignment for my 'final'...Can't wait to see what it is!
Have a colorful day!


1 comment:
Again with all that inky goodness!! What great and awesome cards you have here today!! Love them! I am happy that you decided to go monochromatic, I do agree with you that the monochromatic look does look better. All that gold looks incredible including the splatters. For your wood planking card, I thought the rustic feel of your card was really cool. It looked really like a fal card that could also be used as a Christmas card. Love the texture on that one too. Your third and final card also looked incredible with the grungy, metallic look. Amazing work. Keep up the awesome work.
Thank you for entering your fabulous work to the AECP assignment gallery. Super work!
Post a Comment