Friday, June 23, 2023

Scraps and Sequins - JUST ADD INK HONORABLE MENTION! & TIC TAC TOE DESIGN TEAM PICK

 Hi all!

Raise your hand if you have a scrap bin...we all do, right?  It's nearly impossible to throw away even the smallest piece of paper if there is space for a die cut or stamp.  I have 2 binders for scrap papers AND a drawer under my paper cutter, as well as 5 little bins for extra die cuts, sentiments, and background papers...yes I'm very organized, HA!  When I saw the challenges for Just Add Ink and the Tic Tac Toe Challenges, I knew I could easily whip up something for it!  For JAI, I of course chose the sequins and added some scrap die pieces. For TTT, I went with Craft tool (die cutter), patterned paper (which I made this week) and die cuts (the window and leaves)


The patterned background paper was made when I featured a technique on my very first YouTube video this week.  HOWEVER, the vellum and heat embossed die cut leaves were from my scrap bin from a card I didn't complete YEARS ago, and the vellum came from my paper cutter scrap drawer.


I absolutely adore the granite background paper I made.  The colors and textures are just amazing!  When I found the Altenew Leaf Canopy vellum die cuts in my flower/leaf scrap bin, I pulled out the set and stamped the image all over the granite paper with Grapevine fresh dye ink.  It just kicked that paper up a notch!


The window has 3 layers, 2 white 110 lb card stock, and the background paper.  It was cut using Altenew's new Ornate Nesting die set.  The papers were stacked, then a piece of vellum with a heat embossed sentiment from the stamp set was attached on the back side.  The positive piece from the granite paper was placed behind the vellum and centered in the window.  


The scrap die cuts were added, and no card is complete without a little sparkle!  Pink sequins were added following the direction of the leaves.  This little creation will be given to one of my girlfriends on our upcoming trip in July.


If you're interested, here is the video on how the background paper was created.  Please like and follow!

Have a colorful day!

Thursday, June 22, 2023

Sooo...we bought a boat....

 Hi all!

I have another sneak peek for you today!  I'm a guest designer for Altenew for their July release, and this die set and coordinating stamp set is a classic design.  AND...it's kind of perfect that I'm a part of it because.....we accidently bought a boat.  Yup, we are now boat people......


Anyway, starting July 5th, Altenew will release this adorable die set Wooden Boat and its coordinating stamp and die set Boat Adventures (the links won't be active until the 5th...you'll have to be patient!)  It makes such fun and classic cards and is an amazing set also for those scrapbooking boat-y people!  I'm completely hooked on it and its not just because I have a boat.

I was inspired by this weeks JUGS Inspiration Challenge photo and knew I had to use this die set for it.  I don't own any beachy type stamp sets or even papers for that matter, so this set came to the rescue!  I wanted to create the texture of sand so I used Kraft cardstock for the background sand color and added splatters of every color of brown (and black) watercolor paint I own. 

The boat itself is SO incredibly easy to put together!  I decided to use the color of the sand again for the boat but added red and yellow accents to match the odd ball house in the inspiration photo.  The little die cut of pond of water is also from a new release set, but I'll feature that at a later time...I've got to save something to surprise you all with!!  The pond is cut our of some blue granite patterned paper I made to match the blue houses in the photo.  If you're interested in learning how to make the paper, visit my new YouTube channel, I've made a tutorial on how to do it.  The technique makes paper with an amazing pattern, I love it!


I finished the card off with the sentiment from the Boat Adventures set, stamped and embossed with black powder.  If I were to do it again, I would stamp with black ink and use clear powder...but I wasn't thinking so, it'll do for now.  It's finished off with these amazing sequins...they are like a chameleon...they work for every card even though they are supposed to be green?!?  I've used them for ivory, yellow, green and now brown cards and they magically match each project...I love it when that happens...

Stay tuned for the next 4 weeks for LOTS of new products from Altenew I have the privilege to work with!

Have a colorful day!

Wednesday, June 21, 2023

It's finally LAUNCHED!!

 Hi all!

Its been 6 days since I've been able to sit down in my studio to create... Instead of creating, I've been developing my NEW YouTube channel!  I'm very much a newbie, so I'm trying to give myself some grace with the finished product.  I've officially launched it today, so if you have a chance, check it out and give me ANY advice you might have to make it better, it would be greatly appreciated.  SO without further ado, here it is! 

I decided to focus on a technique that I loved doing with my students, and it translates well into paper crafting.  You have all seen this before, but I'm hoping this video makes you realize bubble art makes INCREDIBLE granite patterned papers! This is a great watercolor project. 


The dye ink reinkers are the same as liquid watercolor paints so they are perfect for this technique.  I've decided to add this to the Happy Little Stampers Watercolor Challenge his month, with the theme of bright colors.  I've also decided to add the second card to the Inkspirational Challenge this week, Embossed Backgrounds, Addicted to Stamps & More Birthday Challenge and the Shop Our Stash challenge this week, Sentimentally Yours.


Isn't the paper stunning?  I really love how it came out.  I've made other papers with blue colors you can see HERE.  This easy technique is easy and only needs water, dish soap and dye ink refillers!


The Mega Hello die from Altenew is the perfect die to use with this beautiful paper.  And using only 1/4 of the piece of cardstock I created, I was able to make 2 different cards.  To complement my first card, I used the Sentiment Strips stamp set to add the 'you make me so' strip.  

This second card has a sneak peek die set on it!  The Versatile Greetings 2 die and foil set will be available on July1st, so stay tuned here for updates and a giveaway from Altenew then!

Thank you so much for visiting me today, I hope you like the video and hope you'll subscribe!  

Hope you have a colorful day!


Thursday, June 15, 2023

Still learning...

 Hi all!

Learning a new skill takes time and I really need to be patient with myself.  I'm starting a YouTube channel as was suggested, and it's harder than I thought it would be!  Any one have any pointers?  Until I get that up and running (hopefully by the 1st of July) I'm trying to keep going with some challenges.


I received this Altenew Botanical Line Art Set w couple weeks ago, it's part of their amazing Craft Your Life series.  I think this was a one-time offer set as I don't see it on their site, but you should join the subscription, otherwise you can miss out on some really beautiful limited edition sets!  I feel this set lends toward a loose watercolor type of coloring, so I opted to use my Atenew watercolor pan set for it.  Like videography, watercolor painting has always been elusive.  I always ended up with grainy washes, but love the look of a beautiful watercolor botanical like the ones from the uber talented Helen Dealtry.  Someday I will paint like her, but until then, this stamp set is a perfect substitution.  

I started by heat embossing with white powder the images onto Bristol cardstock.  I like the smooth texture it has. Since I didn't have any smooth watercolor paper left, its a good substitution.  I decided to follow the Altenew's June Inspiration Challenge color story and started by filling in the background of the flowers with Evergreen paint.  I hated it...like really hated it.  I figured I just needed to fill int he flowers with the purple and pink colors.  I painted the blossoms and added a bit of salt to the washes to give the blossoms some texture.  Now that I loved!  HOWEVER...I still hated the green background.  

I decided to do what I avoid at all costs...I fussy cut the blossoms.  Much better.  I did use the left over background paper for the leaves in the background...still didn't like it, but since it's not the entire background, I deemed it passable.  I placed all my pieces on a dark green panel that I splattered with Evergreen and gold shimmer watercolor paints.  Very subtle.  I finished it off with a white heat embossed sentiment from the same set.  

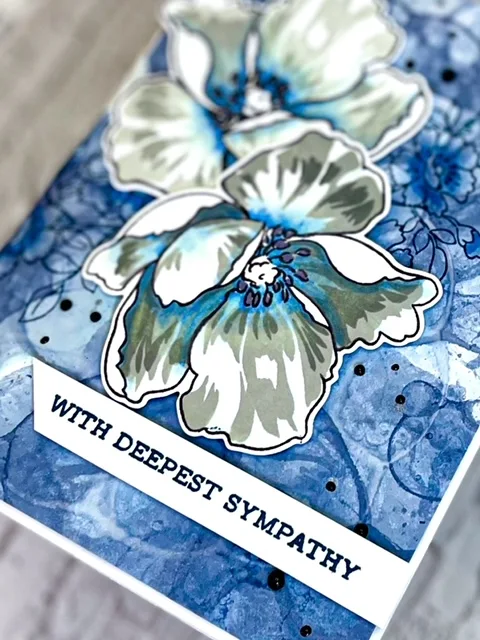
It may not look like much of a sympathy card with it's bright colors, but I figure that's when people need some brightness in their lives...right?

Have a wonderfully colorful day!

Friday, June 9, 2023

SERENITY NOW!!! - HLS CHALLENGE WINNER!

 Hi all...

We've all been there...I'm sure of it.  You're nearly finished with a fabulous creation...then catastrophe...a smudge, or...SOMETHING that ruins it!  That was this one... I was nearly done...then it went wrong...


This card was created for the JUGS Challenge, the Flower Challenge and the HLS Watercolor challenge.  I'm also popping this in the Beautiful Blooms challenge, even though I didn't use the optional mood board. I love the color combo and it was an opportunity to do a watercolor paint technique that I needed to make a video about...Fyi, I'm starting a YouTube channel, hope you'll visit and follow...more info on that later...  Tulips are my mom's favorite, so I'm counting that as a toward the FC this week.

After the fabulous background paper was created, I then used Altenew's Grateful Heart stamp set of tulips add to the front. I only used the outline and the #'s 3 & 4 stamps using grey inks.  I used alcohol inks to add the color so I could keep them mostly white.  The coloring....which I am not fabulous at, but working on...was done and I was REALLY happy with it.  Like REALLY HAPPY.  I placed the 2 flowers on the card front with foam tape...so far so good.  Then, I decided it needed a little bit of black.  SO...I pulled out my USUALLY handy and CONSISTANT black enamel dot gel...and in it's defense, it's old and sticky and string-y...I should have foreseen this....

I added black to the stamen of the flowers.  Looks good, and I always like a bit of shine or sparkle.  Then....I placed a dot...it had a tail.  I panicked!  I grabbed a trusty tool and set to correct and remove the tail.  So far so good.  After it was corrected........that's when I saw it... I had placed my FINGER IN THE STAMEN!!!  AAGGGHHH!............It's ok...I'll just make another flower like that one.  I gently pull that flower off.............I HAD STUCK MY FINGER IN THE OTHER FLOWER!!!!!! NNNOOOOOOOOOOO!

Like Kramer from Seinfield...which is my maiden name fyi....SERENITY NOW!!!!!!!!!!  For all things good and holy, I nearly lost my mind!  I stood up, took a stroll around the studio and pet the dogs.  At that point the only thing I could do was re-create the flowers.  Not as good as the original, but at this point, I'll take what I can get.  

I did pull out the enamel gel again...and held my breath while doing it.  They cooporated this time.....thank goodness... I'm glad I finished it and it was a pretty close version of my original plan.

That's it for today, I hope your day is filled with color!!

Wednesday, June 7, 2023

Trying to keep up!

 Hello all!

Its been crazy around here...healing from shingles, babysitting, helping with my parents, cleaning and organizing the studio, and getting my teenagers to get moving before 10 am.  I am glad its summer and excited to get back to creating in my studio this week!


I've had the links up for multiple challenges on my computer for 2 weeks now, so I decided to get started on them asap! I've combined 2 challenges with this card, Altenew's June Inspiration ChallengeFreshly Made Sketches. and the Beautiful Blooms challenge even though I didn't use the mood board this time...

I loved the colors Deepa chose for this month's Altenew challenge, bright and cheery!  I've been into those colors lately, perhaps because of summer?  I used the Enchanted Garden, Tropical Forest and Rose Petal color family inks, and the flowers from the Hellebore Build a Flower stamp set all from Altenew.  After organizing and cleaning the studio, I've purged some but also committed to using all the sets that haven't seen any ink in a while and this one reminded me of the inspiration picture.

When inspired by the layout, I decided to turn it on it's side, and move the sentiment to fit the change. The Woven stencil is a new purchase and I used Wisteria ink from the Enchanted Garden color family just down the center of the card panel.

This card has a ton of shine, partially due to the Fine Frames Circle die for the background.  I also added some shimmer with gold foil and a glue pen!  Although, I had a hard time waiting for the glue to dry to add the foil, but I made do.  I chose to do the sentiment with Jet Black ink, it felt it looked better than a color...what do you think?

Thanks so much for stopping by, I hope you have a colorful day!

Thursday, June 1, 2023

Coloring fun

 Hi all!

Isn't fun when you get a little surprise in a box of product you ordered?  Altenew puts in a discount card for you next order, usually a percentage off and I generally don't look at the other side. WELL.... that has changed!


On the opposite side of the discount card is an image to use for your cards!!  Its a black and white outline for you to color as you see fit.  Such genius people that work there, really.  This month's image was of dogwood blossoms.  Ironic as we have decided to transplant 3 hydrenga bushes in our front yard to put one in.  I've spent the spring admiring trees around town and realized I needed one for myself.

Since the transplant won't happen until the fall, these lovely blossoms will have to do!  I don't have many alcohol markers in my stash, quite honestly I'm intimidated and confused by them.  However, I decided to pull out my limited colors and try them out on this image. Since the limited colors I have match the Inkspiration mood board, I'm sending it over for consideration.  I'm not to disappointed with it...not impressed, but not disappointed either.  I did have to fussy cut it out...which I hate...to add it to my card.

I added the Circle Quilt Cover die by Altenew for the background and the cut out die fit perfectly on it.  So...that made me hate the fussy cutting less....  I did add some Mountian Mist ink to the background panel before I placed the die cut over it for a little extra.  

I kept the bling to a minimum using only the Versatile Greetings 2 die set with gold foil paper to add the sparkle.  This AMAZING die set is part of Altenew's July launch, so be on the look out for it soon.  I get to give little sneak peeks for the items, and they won't disappoint, so save your pennies!

Have a colorful day!!


CAS Scraps

 Hi all!

It’s been a crazy 2 weeks of guest designer work, traveling for the holiday weekend and now a minor shingles attack.  It’s not as painful as last time and for that I am grateful!


Today was the first day since our return from Petoskey to feel well enough to go into the studio and it's my first challenge in 2 weeks!  I thought I'd play along with JUGS Silhouette challenge since it ends tonight.  I started small and decided to work with what I already had on hand in order to gain momentum…so to the scrap bins I went...I have 4, how many do you have?

I found this black embossed leaf from Altenew’s Leaf Canopy.  It’s perfect for a silhouette card.  I also found the pink die cut I had made from Altenew’s Snowflake Layer die and colored but never used it.  I decided to cut it into pieces for the background behind the leave cluster.

I finished off the card with a splatter of black watercolor paint and again from my sentiment box...this came from Altenew's Its For You stamp and die set.  It's no longer on their site, so I think they've discontinued it.  It has a great telephone stamp though...

SO...the card is CAS in design, but has layers of die cuts....hopefully it 'makes the cut'...😉😉😏😏!

Have a colorful week!


Thursday, May 18, 2023

AAAGGGHHH! - JUGS CHIC OF THE WEEK WINNER! - THE COLOR CHALLENGE SHOUT OUT! - THE FLOWER CHALLENGE HONORABLE MENTION!

 Hello all,

I'm working on product projects for Altenew; the die, sentiment and the background panel are all new products being launched on July 1st!   This card is my first sneak peek and I will post a new project each week until the final launch on July 1st.  I am even launching my YouTube channel these next few weeks so stay tuned for the links for those videos!  Its really all very exciting for me....

NOW..to the card on hand...I have made MANY, MANY projects with these items...BUT...for some reason...THIS one...oh lordy be...  Have you ever had one of the cards where you worked hard and then EVERYTHING started going wrong?!?!  I can't be the only one....THIS CARD HAS BEEN THE BANE OF MY EXISTANCE TODAY!!!


I CAN NOT blame the lily dies, because they are absolutely lovely and go together perfectly with the layers.  Really, they go together like a dream!  My insistence on attempting to make realistic stargazer lilies...when I am not the glorious Jaycee Gaspar...AND THE FINISHING OF THE CARD???....gave me a run for my money today I'm tellin' ya...  It has made me bring out my southern drawl!

After I did the ink shading for the lilies, I layered them and used the ever handy press and seal paper to get perfect placement.  I wasn't thrilled with my shading but wasn't too disappointed.  I then made 3 different backgrounds, debating which to use and settled for this one.  After that is when it went down hill....FAST!

The flowers were placed on the background panel...crooked, and when I peeled off the press and seal, it peeled off some of the edge of a flower! UGGH, but not the end of the world... Next issue? The splatters from my spray wouldn't splatter, and when they FINALLY did, they went all WACK-A-DOODLE... Ok...it's ok, not great, but...ok.  THEN...the die cut sentiment would NOT go on straight and started bending...damn old lady vision and caffeine shaky fingers...I had to give up on the letter 'r' for my sanity.  Finally, when I stamped the other part of the sentiment, I had to do it 3x because the tail end of it was crooked, then I cut it crooked!!!  I had to just finish it as best I could at that point so I could have a sense of some type of accomplishment!!!

So there it is...the overall image is lovely, but my craftmanship leaves a LOT to be desired.  Although I had issues today, I have been SO INCREDIBLY blessed and honored to be a part of this product launch and am EXCITED to show you all the things I have been working on with these fantastic items!  I am also submitting these to the JUGS #679 Wedding challenge, the Color Throwdown Challenge #743 of pink, lime green and white and The Flower Challenge #80 pastel flowers.

Wedding season

 Hello all!

Did you know I spent over 15 years as a florist/event designer?  Yup.  We did weddings, parties and corporate events, I've even traveled internationally to produce events.  I loved the creating, the coordination and the looks on peoples faces as they entered a room we had completed.  It was an incredibly challenging but rewarding job! 

I have been in pre-release mode for Altenew (more on that at a later date) and decided to set that aside for the day and work on some challenges.  Since wedding season is upon us, and we have a couple to go to this summer, the JUGS Challenge #679 helped me get started on my cards for the showers and wedding.  I adored this one from the design team, and this lovely one reminded me of the technique I used today.

This was a REALLY simple card to create, and I even used some left over shimmer blush paper from my own wedding 8 years ago.  Appropriate for this I felt.

I started with Altenew's Engraved Motifs embossing folder and inked the negative side with some gold pigment ink.  After the paper was embossed, using an ink blending brush, I added some Pink Pearl to the centers of the flowers.

The sentiment from Altenew's Leaf Canopy was stamped and embossed with gold on vellum to keep the over all look soft and pretty.  The gems have been sitting in my gem box for eons and had to see the light of day.

Thanks for visiting and have a colorful day!!

Christmas tags with SOC!

Hi all! It’s the crazy holiday season but you still need to create!  Join us for Sisterhood of Crafters challenge this time around.  It’s an...